3D Printing Log
This is a rough (and uneditied) log of my 3D printing attempts. I’m posting it mainly as I see no harm in that, rather than a believe that my poorly written scribbling with be of greate sorcial benefit.
(The spelling mistakes above and below should be considered as intentional here as they are in 419 scams)
Second Loggening
??? / ???
- the rest of the hagglethorn models
??? Hagglethorn Tavern
- scale z 120%
- ini layer 0.36
- bed 65⁄60
- noz 195
- brim 8mm @ .2mm
- infill 10%
“tavern roof” is (100, 100, 120) and i’m doing 10% infill to be CHEEP
2023-06-06? / Myari Case
- i previously levelled the bed with the z-axis 0.2mm up
- i haven’t touched it; it’s probably shifted after two prints though
- initial layer thickness 0.36
- to compensate for the funky leveling above, and, help with adhesion
- bed head 65⁄60
- i have a glass bed
- adhesion with brim that’s 0.15mm away
- i’m pushing this a tiny bit since i’m not totally satisifed
- i needed to rotate the model so that it’d fit on the build plate
myari-case2/3/4
it’s been a few tries - i think the issue was a meek powersupply for the pi3
2023-06-04 / Ender 3 Terran Bunker Fan Guard
As a test of my 1mm thing, I started this fan guard thing. It is a complete decadence, but, I think that it’ll be “fine” if it warps or detaches. Maybe.
…
It came out fine. There’s some nerding and some “unraveling” on the underside which … it fine … it’s a flat surface bro! Overall I don’t think that the headache of supports would justify the cosmetic improvements.
- move z axis up by 0.2 THEN level the bed
- the bed wibbles … if it wasn’t glass, i’d suspect it was warped
- initial layer thickness 0.36
- to compensate for the funky leveling above
- bed head 65⁄60
- i have a glass bed (as above)
- adhesion wiht brim that.s 0.1mm away
- i want the benefit of a skirt without the clingy of a brim
2023-06-04 / PTFE Cutting Guide
I cleared the clog, removed the hood, reinstalled OctoPrint (don’t know why it’s gone) and … printed a PTFE Cutting Guide after three tries.
I feel optimistic as long as I recall these details;
- move z axis up by 0.2 THEN level the bed
- the bed wibbles … if it wasn’t glass, i’d suspect it was warped
- initial layer thickness 0.36
- to compensate for the funky leveling above
- bed head 65⁄60
- i have a glass bed (as above)
- adhesion wiht brim that.s 0.05mm away
- … actually … i’d like to vary this to be 0.1 again
2023-05-08 / carsoul tray
used default settings
checked after 31 minutes and heard skipping - why god!?
tuned nozzle up to 215 - here’s hoping that the skipping wasn’t heat creep!
… which it was … so let’s go back down to 190 and hope for the best
… and it heat-clogged
TODO
prose
- Heliox Base (replacement)
- from; https://www.youtube.com/watch?v=bKq9psMT-do
- https://cults3d.com/fr/mod%C3%A8le-3d/maison/lampe-articulee-avec-video-explicative
- i was using a customised part. lefuk
- … or replace …
- from; https://www.youtube.com/watch?v=bKq9psMT-do
- Hagglethorn Hollow
- “full” hagglethorn tower
- i’ve done parts of this and they borked so are glued together
- https://www.printablescenery.com/product/hagglethorn-tower/
- just need the “base” now
- guildhall
- tavern
- chieftan’s hall
- longhouse
- ruined cottage
- shares homestead base
- https://www.printablescenery.com/product/the-ruined-cottage-hagglethorn-hollow/
- ruined homestead
- shares homestead base
- https://www.printablescenery.com/product/ruined-homestead-hagglethorn-hollow/
- ruined longhouse
- ancient ruins
- scatter terrain, random
- https://www.printablescenery.com/product/hagglethorn-ancient-ruins/
- “full” hagglethorn tower
- (another) GW Paint Spindle
- anvil stuff
- ruined town
- (town) https://www.thingiverse.com/thing:4729415
- (house/rubble) https://www.thingiverse.com/thing:4286926
- trees
- ruined town
- underworlks organisers
- pretty https://www.thingiverse.com/thing:3143721
- two parts, but, can go as one plate
- 15h7m
- 75g
- someone says … their remix is better?
- only holds 6 hexex. need 9+
- two parts, but, can go as one plate
- simple https://www.thingiverse.com/thing:3579194
- two parts, but on their sides
- 1d16h2m
- 209g
- two parts, but on their sides
- pretty https://www.thingiverse.com/thing:3143721
table
| author | model | part | standalone | profile | time | mass |
|---|---|---|---|---|---|---|
| anvil | ||||||
| anvil | big house | MA_RuinedTown_BigHouse_Base | lower | jayo-105 | 1d23h44m | 203g |
| anvil | big house | MA_RuinedTown_BigHouse_FirstFloor | upper | jayo-105 | 20h24m | 91g |
| anvil | house ruins | MA_Ruined_House_01 | jayo-105 | 8h31m | 33g | |
| anvil | house ruins | MA_Ruined_House_02 | jayo-105 | 10h40m | 41g | |
| anvil | house ruins | MA_Ruined_House_03 | jayo-105 | 8h40m | 34g | |
| Paint Carousel | ||||||
| Paint Carousel | Tray | jayo-105 | 4h58m | 23g | ||
| Paint Carousel | Spindle | jayo-105 | 10h4m | 46g | ||
| Hagglethorn | ||||||
| Hagglethorn | Homestead | Base | no | jayo-105 | 1d16h10m | 158g |
| Hagglethorn | Ruined Cottage | Roof | jayo-105 | 1d04h27m | 93g | |
| Hagglethorn | Ruined Homestead | roof | level | jayo-105 | 16h29m | 49g |
| Hagglethorn | Ruined Homestead | body | level | jayo-105 | 1d17h48m | 130g |
| Hagglethorn | Tower | base | no | jayo-105 | 2d00h43m | 200g |
| Hagglethorn | ||||||
| Hagglethorn | Large | Base-A | no2 | jayo-105 | 2d15h09m | 255g |
| Hagglethorn | Large | Base-B | no2 | jayo-105 | 1d13h29m | 155g |
| Hagglethorn | Large | Dungeon-A | no1 | jayo-105 | 1d13h59m | 148g |
| Hagglethorn | Large | Dungeon-B | no1 | jayo-105 | 1d16h51m | 169g |
| Hagglethorn | Large | Dungeon-C | no1 | jayo-105 | 1d13h50m | 162g |
| Hagglethorn | Large | Dungeon-D | no1 | jayo-105 | 1d0h21m | 102g |
| Hagglethorn | Tavern | Roof-A | level | jayo-105 | 2d14h30m | 334g |
| Hagglethorn | Tavern | Roof-B | level | jayo-105 | 3d00h48m | 406g |
| Hagglethorn | Tavern | Roof-C | level | jayo-105 | 1d03h19m | 138g |
| Hagglethorn | Tavern | Roof-D | level | jayo-105 | 1d15h13m | 196g |
| Hagglethorn | Tavern | Chimney | level | jayo-105 | 1h1m | 4g |
acquire/design
- dice twoers
- ? cases for Underworlds
- ? cases for Cursed City
deets
firmware (stock) 1.1.6.2 hardware; v1.1.4
the numbers match what’s on the creality website
eryone (again hagglethorn tavern)
ey.115 dungeon-d
did some checks
as-si … dungeon-d seems next
| part | sliced | time |
|---|---|---|
| tavern-roof-a +20 | 390g | 3d02h10m |
| tavern-roof-b +20 | 478g | 3d15h18m |
| dungeon-d | 101g | 1d01h07m |
ey.115-1.haggle.dungeon-d
1d01h07m 101g
…
some peeling on the +x-y corner, but, it looks limited to the brim
did hear a click as the printer was working; wonder if yellow and grey are different profiles for heating?
8 rows of yellow on the spool at 1347
…
exactly six at 1415
so … go swap spool in an hour?
ey.114 tavern-roof-c-p1
trying again BUT with a new spool
ey.114-1.tavern-roof-c-p1
reusing the ey.112-1.tavern-roof-c-p1 file
…
seems grreat
ey.113 carsoul-tray (fine)
ey.113-1
ey.110-1.carousel-tray-16
i’m doing it with JUST the dregs
…
some skipping near the end of the grey roll
…
the swap left a “wart” - i tried to use clippers to get it, but, ended up pulling most of the early layers off
failed the print because of a botched hot-swap
ey.113-2
using just the yellow spool
i’ll use the rest for scraploading
ey.112 (failed - atypically)
using some of the yelklow i have left
ey.112-1.tavern-roof-c-p1
75g 16h0m
gonna have to hot-swap to a new roll; let’s go anyway
…
okay
the cable became tangled and the print failed
i’m going to do a carsoul tray
ey.111
want to do tavern-c
it needs 163g, but, i have around 100g
c-pt1 needs 75g
c-pt2 needs 97g
part 2 will
ey.111-1.tavern-roof-c-p2
97g / 32.57m 18h25m
ey.111-1.tavern-roof-c-p2
…
seems fine
ALMOST DRY THO
ey.110 carousel-tray (done)
after 108-1 i should have around 56g of material available
a carousel tray seems approps
76g for both
ey.110-1.carousel-tray-16
3h55m 24g
i think that there’s 105g left on the spool
…
21g and perfect
spool should have around 84g left
ey.109 carousel spindle (done)
need another of these
https://www.thingiverse.com/thing:2436687
ey.109-1.carousel-pole-16.8h21m
gonna up the thickness from 0.12 to 0.2 but otherwise keep it all as is
107 and 108 are the same, so, i’m keeping 107
infill to 20 from 10 = 10h45m 52g
infill to 20 from 10
layer height 0.2 = 6h52m 53g
infill to 20 from 10
layer height 0.16 = 8h21m 53g
(math below says)
computed weight of the carousel pole will be 50g, leaving 120g on the roll
started print by clearning the filament (again) but didn’t level the bed
there should be 120g of filament left after this - but - let’s be safe and use CURA’s estimates; say it’s 117
…
there was an adhesion failure around the edges. i’m going to reslice with THICK base and CLOSER skirt
failure weight is 15g
ey.109-2.carousel-pole-16.8h21m
brim distance to 0.2 (was 0.35) first layer 0.32 (was 0.24) initial layer flow = 100% (was 90%)
8h22m 54g
…
reset and relevelled after strating (derp)
the bed was “less than level” - maybe the big house print left it uneven after 2 days of printing?
…
slight adhesion on/near origin
came out fine - less than 50g of material but i’v emeasured it three times and forgotten
ey.108 tavern-roof-d (done)
let’s go do the roof!
i cleared the filament before starting
ey.108-1.haggle.tavern-roof-d (success)
it’s so tall but i think i’m going to love it
i totally cleaned the nozzle and had 360g on the spool when i started
…
printing seems GREAT in this cold
…
came out gorgeous
weights
- 358g active roll
- 376g two dry rolls
- 219g last print actual
- 230g last print estimate
… so …
average spool = 188g remaining filament = 170g
actual prints use 95.22% of the estimated mass
-> computed weight of the carousel pole will be 50g
ey.107 tavern chimney (done)
let’s start “the tavern” with the chimney
i’m stretching it to be 20% taller
ey.107-1.haggle.tavern.chimney
1h9m 4g
- temps
- PLA is 90 - 93% of PLA+ heat so i’m turning it down
- bed; 65
- end; 200
- initial layer-flow; 90%
- speed
- general was 45, but now = 40
- initial was ??, but now = 30
- fan speeds reset to default because IT’S COLDER THAN HELL here
.. BAM … it worked
jayo
jayo.106 tower base (done)
jayo.106-1
i’m using the pre-sliced model file with the 105 profile
i’m going to run it at the 85% feed rate until it starts infill to see if that helps
…
0:44
some skipping, helped and laxed
jayo.105 tower ring (success)
spool is running low :)
jayo.105-1.tower-ring
- halved the brim witdth
- raised the brim distance to 0.35 (was 0.25)
- brim only on outside
…
some skipping
laxed, pushed, and finally turned down to 85% to fixit
jayo.104 tower spire (success)
i’m anticipating simpler print as this is a smaller surface
jayo.104-1.tower-spire
same settings as jayo.102-1.tower-body-b
setup while doing 103, intent is to launch it at 1am when 103 finishes
jayo.104-1.tower-spire.15h19m.69g
…
0 :!5 skipping - cause it’s on 150%fr still
…
0:25 skipping
cause cable is taught?
jayo.103 tower body-c (complete)
i’m anticipating simpler print as this is a smaller surface
jayo.103-1.tower-body-c
same settings as jayo.102-1.tower-body-b
7h26m 31g
jayo.103-1.tower-body-c.7h26m.31g
…
0:37
skipping
helped about 2cm and laxed the filament
…
1:03
skipping
helped about 30s and laxed the filament
…
2:00
no skipping
turned it up to 120% speed
…
turned it up to 150% later
i heard no skipping
there was some stringing and under extrusion on some of the peaks
print came lose fine
jayo.102 tower body-b (done)
jayo.102-1.tower-body-b
- nozzle 220 always
- bed 70 always
- full fan at layer 3 (was 4)
- infill 10 (was 15)
…
0:45
skipping, helped it, not sure what else to do
…
1:13
skipping, helped it, not sure what else to do
…
seems fine when done
jayo.101 tower body-a
jayo.101-1.tower-body-a
turning infill down from 20 to 15
jayo.101-1.tower-body-a.1d5h58m.135g
…
0:47
skipping is back
215⁄70 temps
…
1:16
helped for about a minute
temp to 220⁄70
…
hey … there’s some stringing but it seems fine i guess
jayo.100 last bit of the barracks
jayo.100-1.barracks-main-pt4-flat.stl
using; jayo.99-1.barracks-main-pt3-todo
- initial layer speed up to 30
- wall speed up to 35
- initial bed temp 70
- print temp 215
- initial print temp 220
- brim distance to 0.25mm (was 1.0mm)
…
came out fine
i am relieved
jayo.99
jayo.99-1.barracks-main-pt3-todo
- print speed 45 (was 50)
- wall speed 25 (was 22.5)
- initial speed 25 (was 20)
jayo.99-1.barracks-main-pt3-todo.18h21m.77g
…
1:12
it saeems to have jammed
i lowered the temp to 215 and pushed it through which seems to have fixed it
…
final print was fine
it’s fine
there’s some peeling, but, nothing i need to deal with
jayo.98
gonna just try the carasoul again
jayo.98-1.cara-tray.5h51m.24g PEELED TO DROSS
- reset profile
- use 0.24mm ini layer
- 45mm/s speed
- 25m/s initial
- nozzle 215
- packet says 210 - 235, so
- 20% ini fan speed
- brim but at 2mm
…
okay
no
can’t reset the password?
b’ah - i’ll reinstall octo
octoprint/octoprint "/init" 4 months ago Up 3 weeks 80/tcp, 0.0.0.0:5000->5000/tcp quirky_meninsky
docker run -d \
  --restart always \
  -p 5000:5000 \
  --device=/dev/ttyUSB0:/dev/ttyACM0 \
  octoprint/octoprint
https://howchoo.com/g/ntg5yzg1odk/using-octoprint-with-the-creality-ender-3-3d-printer
okay … let’s go
…
well that hasn’t broken yet
…
lost adhesion and “bakc squiting” coated the nozzle
… and the nozzle was lose …
jayo.98-2.cara-tray.5h51m.24g CAUTIOUS ABORT
as above but - raising the bed to 55 - lowering ini fan speed to 10%
…
0:37
nozzle to 220
speed to 90%
hope that stops the skipping
…
at 01:30 i’m peeling and skipping
turning bed up to 60 now and NEXT
…
ughhh
jayo.98-3.cara-tray ABORT - PEEILING
- reset profile
- use 0.24mm ini layer
- nozzle 222.5c
- bed 75c
- 10% ini fan speed
- brim but at 1mm and on inside as well
jayo.98-3.cara-tray.5h34m.24g
these settings follow the box instructions
…
00:28
no click yet!
and it stick!
…
00:48
there was some skipping but a more worrying wart that looked like it’d grab onto the nozzle
ABORT
jayo.98-4.cara-tray HEAT CLOGGED
reprint of jayo.98-3.cara-tray with the hood in place
…
0:49 failed
full heat clog
jayo.98-4.cara-tray SUCCESS
reprint of jayo.98-3.cara-tray with no hood
hotd
…
0:48
some skipping but otherwise fine i guess
…
seemed to workout fine
jayo.97 ()
trying andy’s brand of filament
jayo.97-01.barracks-todo-pt3 / 17h28m.72g
from ey.96-15 but defaults (suepr quality) then
- initial layer height 0.32
- infil 15% (defaulkt is 20)
- infil before walls (new)
- nozzle 210 (not 200)
- plate 60 (not 50)
- initial layer speed 30mm/s (not 20)
- initial fan speed 10% (from 0)
- brim plate adhesion
- brim distance 0.4mm
…
00:08
already heard a skip
print is peeling despite hairspraiy … i’ll open the curtain]
…
00:32
totally jammed
jayo.97-02.barracks-todo-pt3 / 17h28m.72g
- nozzle 215
- fan speed 0%
…
deets are wrong?
first print didn’t stick?
WRONG FILE
…
01:32
major skipping
pushed and raised to 220
…
at some point, it jammed
maybe
tops look awfully smooth
extruder gear also came loose
weird AF
ey.96-15 (pt3 of 4 - trying to tune for what i heard)
Eryone - 3 x8
… which is now a silver colour …
I bought two of these from Amazon then, I went “whole hog” and ordered a pack of 6 spools directy from the maker. This saved a lot of money.
My results havce been oddly crap though.
ey.96 (resume) / hagthor-barracks-main
ey.96-05 (retry of ey.96-04)
i’ve replaced the extruder gear/clamp/pully with a cr-10 all metal one
i’ve replace the nozzle
i’ve replaced the bowden tube with a long piece of the “blue” tube … i’m susicous about that
i think that “januine capricorn” after a cooling replacement should be my next purchases if this works
if this fails - try amazon basicfil
i did check the e-steps; i tried to make it move 47.5cm and i think that it moved 47cm
at that distance, the curving of the filament would seem the culprit - right?
2022-09-02 1845 i began a reprint ofg ey.96-04
…
adhesions failed
ey.96-06 (retry of ey.96-04)
cleaned with meth
re-leveled
2022-09-02 1932
…
brim seems to have gone down fine
…
01:58
i heard skipping and checked
there’s some uneveness on the layer which implies it was skipping for awhile
i “helped it” and the filament began going down smoothly
…
03:10
a corner has peeled
i hope that the printing doesn’t pull it off
print seems otherwise fine … but it’s about a CM off the bed
https://www.reddit.com/r/ender3/comments/as2e89/edge_peeling/
okay … so … maybe more flow AND reduce nose fan for first few layers if this fails?
…
4:10
Skipping. I helped it and it cleared up
Speed to 90% bed to 210
…
???
7am
printer constantly skipping (not jammed yet) when i awoke in the AM
removed bowden and found filament was swollen - heat creep
let’s get a better fan methinks?
maybe slow TF down and lower the temp.
ey.96-07.barracks-main-todo.2d0h20m.189g.gcode (based on ey.96-04)
i cleaned the head and the bed
i will now re-slice with “more default” settings
(the resume seems to join nicely with what’s already done)
- nozzle to 205 as that’s the midpoint for the filament
- build plate temp to 62.5 and initial to 65
- wall seep 30 (was 35, default is 25)
- don’t think that i got that far last time
- ini layer speed 25 (was 40, default 20)
- cooling default, then, inital layer cooling 20%
- brim distance is 0.2 (was 0.1 def 0.0)
…
at 0:23 there was irregular skipping
i lowered the speed to 75%
…
it clicked up
96-08 (reworking)
optimising the orginal?
tried to re-export from openSCAD but the model is gross.
i’m going to mess with it in Blender
decimate operator -
- starts as 1,378,656
- one iteration of “un-subdiviced” 1,373,126
- collapse with
- 0.95 = 1305736
- 0.90 = 1237321
none of these work in OpenScad so I need something else to slit it into parts
chopping up the todo?
i exported the TODO from the STL file
OpenSCAD still doesn’t like it
can i blender cull plane?
… even if i can … it all looks like it’ll collapse
using the small-printer
it’s three and one!
it’s three and another roof piece
this will work!
… looks like the todo model is 83.73m in the “mouth” of the long bit to the right out of the balcony
147.7 on the “stock” model
looks like i should shave 64 off?
these models don’t work in SCAD either!
…
updated OpenSCAD - new error message suggesting that the scanned models are “flawed” but that’s not a bigbig deal
…
i’m going to use Blender for CSG (as that works) and OpenSAD to generate the volume for subtraction
once inserted, i stretched the bottom verts of the the subtraction to enusre there was no 0-layer under the house thing
print settings
- initial layer height 0.32
- infil density 10%
- print temp 200 / 210
- build plate temp 62.5 / 65.0
- initial fan speed 20
- brim adhesion
- brim distance 0.2
ey.96-08.barracks-main-p1-todo.12h56m.56g
starting around 18:38 on Saturday
…
skipping after like 20 minutes
96-09 (cool off 96-08)
- like 96-08 but build plate is at 50 always
…
after 0:08 minutes the adhesion is fine and there are no skips (yet?)
…
after ~25 minutes there’s some skipping but less
i tuned the temps down to 200⁄45
…
it bad skipping again
96-10 (cool off 96-08)
- temps to 200⁄47.5
…
after about 15 minutes adhesion had failed and the thing was skipping
96-11 (reprint of 96-10 with cleaned nozzle)
HOLY HELL - i found a lentil sized wad of filament stuck in the hot end
bowden wasn’t touchign the nozzle i guess
…
00:13
couldn’t se purge line, but, brim seems fine and there was no skipping at the time
…
00:38 aftrer some steady skipping i durned it down to 195 and “helped” for a bit before turning it back to 200 and leaving the flap hiked up
here’s hoping that raising the flap keeps it from accumulating heat
…
00:54
more skipping
helped again
left the cover pulled up this time …
01:09
skipping again
helped again - helping seemed to “take” quicker
lowered bet to 45 and nozzle to 195
…
01:29 or 01:39
heard a skip or two, helped, put the filament spindle on a piece fo dusting cloth to try andhelp with the spinning
maybe add something like this? https://www.thingiverse.com/thing:5436880
…
yeah … yeah it looks good like this
brim “failed” i expect because there was no filament near the nozle, but, overall i feel the settings are “dialed in” quite well
… if … if this works of course …
96-12 (todo part 2 of 4)
- build plate to 45
- nozzle to 195
- brim distance up to 0.3 (old one didn’t quite come away)
let’s see what’s what - eh?
…
00:39?
some skipping
lowered temp to 190
…
02:30?
model has peeled from +x side
restarting
96-13 (todo part 2 of 4 - but with 190 and 0.4)
- nozzle to 190
- brim distance OUT again to .4
- hairspray too
i suspect that the 0.32 initial layer height is somehow connected to stuff touching when the brim is 0.3
ey.96-13.barracks-main-p2-todo.12h6m.45g
…
00:28
slight peeling of the +x brim (maybe i should reduce fan?)
might have heard a skip
…
02:??
lost adheasion - print failed
nozzle seems fine on the inside, outside was covered in dross
ey.96-14 (todo part 2 of 4 - full clean, 190⁄50 no brim)
- nozzle to 190
- bed to 50
- brim OFF
- curtain sloped?
- full clean of bed
- re-level the bed
ey.96-14.barracks-main-p2-todo.12h.44g
start at 19:59pm
…
at 00:16 is skipping, so, i helped it a bit and opened the curtain
…
00:25
totally skipping
lowered bed to 45
raised nozzle to 195
helped for 5⁄10 minutes; still ksippin
if it stops again; i should check the hot end
…
02:13
no real peeling, and, the clicking has stopped sp … maybe?
…
it was successful
ey.96-15 (pt3 of 4 - trying to tune for what i heard)
the skipping seemed to happen during infill, so, i’ve slowed that down
… and sped “flooring” up …
- nozzle 190⁄195
- bed 50⁄45
- first layer “faster” 30 (rather than 20)
- general print speed down to 45
- wall speed up to 30
- fan “sooner”
- inital speed 30 (up from 20)
- regular speed at layer 3 (down from 4)
…
kept skipping on the purge
thrid try; tried t to record it and … no skipping
did lose adhesion ASAP on the first layuer’s outer wall, but, i yoinked that off and seems fine now. hope it’s fine
…
00:58
heat clog and peeling everywhere
let’s try turning it all back to what it was BUT NOT the temperatures and add the skirt
ey.96-16? (maybe)
ey.96-16.barracks-pt4-flat.12h15m.55g
sliced while 96-15 printed, but, before it failed
- adding skirt to try and save it from stuyff
- putting the skirt at 5mm tho
- refixing the model to print upside down with no pegs and reduce overhang
break troubleshooting
i belvie that i adjusted the extruder gear during prior maintenace to starting the ey.96 serries.
on 2022-08-26 the printer had stopped extruding. the printer had been stopped for some time, as, the head was still active and was around 2 inches above the surface of the model. i removed the filament ASAP and got a “bug foot” but also noted that (for the first time) the filament had “torn.”
on 2022-08-27 i removed the extruder gear completely and cleaned it before reasssembling the printer and trying to do a “resumed” version of the model. i noticed that the gear had yellow and possibly white filament resude in it, and i tried to clear it out with a dental pick and blutak. i printed the new model, adhestion et al was fine.
on 2022-08-28 the printer had ceased extruding again, but, hadn’t completed a first layer. there was some amount of buildup on the nozzle - which was surprisng - but i cleaned it off. the filament had torn AGAIN but i decided to leave it rather than clear it now.
when i tried to clear the bowden tube, the filament snapped leaveing a “chunk” about 1 cm long roughly 3 cm intot he bowden tube. this is a stock Capricorn tube, so, can’t be shortened that much as there isn’t enough length for the tube to get from the extruder motor to the hot end. i removed the nozzle as part of this maintenance and noticed some amount of “rust” or “ash” fell out - I’m unsure where this would have come from.
ey.96 / hagthor-barracks-main
resume print thing
using adivce from The Ed
ey.96-01.hagthor-barracks-main
start with ey.95-11
- initial layer height of .32
- printing temp at 200 (normal)
- plate temp at 60
- print speed 55
- wall speed 35
- initial layer speed 40
- initial fan speed 50
- regular fan at layer 2
ey.96-01.hagthor-barracks-main.4d5h55m.549g
…
afrer 32 minues there’s a lot of scrag around the edges
i’m going to reslice with a better brim
…
01:23:00 and still no clicking!?
…
i aborted it and started the “new” one
ey.96-02.hagthor-barracks-main
- initial fan speed 30
- brim
- brim width = 8mm
- brim distance = 0.1mm
ey.96-02.hagthor-barracks-main.4d5h58m.550g.gcode
…
it’s uploaded but the previous one hasn’t jammed yet - odd
…
i started it after cleaning off with meth and bringing the build plate REALLY close
…
adhesion totally failed and i had “spagetti and meatballs”
ey.96-03 (reprint of ey.96-02)
cleaned bed with water
cleaned nozzle a bit
checked around 00:18 and it was okay … little crappy on the supports though …
…
00:37 supports look better, buyt, i heard a skip as i left the room
…
00:52 - no change, heard a skip
…
01:37
stuff seems “smoother” but there’s still some “nattyiness” on the pre-supports
in the future; i should put a brim all around the pre-supported models
…
01:00:13
progressing fine - i am less fearful
some stringing, but, hardly anything to worry about
…
the filament snapped
when i removed the print, and started removing the supports, i tore the first layer off by accident
i also cleaned off the extraction gear - it’s farily deformed so i should replace it if this helps
ey.96-04 (resumption of last)
ey.96-04.barracks-main-todo ey.96-04.barracks-main-todo.2d5h57m.264g
i had a special kind of nightmare trying to get these files “ready”
in the future - i’ll use the “for smaller printer” files to avoid risks
…
i tried culling some cylinders out of the model
getting the modifications in place took more time than it saved on the final print
cutting infill down to 10% was more productive
ey.96-04.barracks-main-todo.1d23h8m.189g
…
cable tore again
interlude - research
issue:
been cloggeing PLA prints since April - haven't tried anything else

replaced hot end, adjusted fan so no more noise

feeding seems fine

after first layer, filament is too swollen in tube.
seems to get "fat" throughout the whole hot-zone/cool-zone
jams

... and yoinking it from the motor-side is quick and easy ...

have moved the nozzle away from the bed; adhesion fails

tried lower temperatures, no adhesion if i'm below 190
tried higher temperatures, feels worrying to exceed 220 though

the filament used to be fine ... so i bought a six pack from the manufacturer and it stopped working mid roll after that


...

i tried fusing some old stuff to the new spool ... but no ...
Have your 3D Prints started to suck? Watch this! https://youtu.be/-cm1vIER_bk
seems to focus on “byte rot”
- printer itself
- bad leveling as bed is worn
- dirty print surface
- worn belts and stuff
- check? won’t be a source of clogs though
- extrusion
- cooked PTFE
- think i should be fine … probably
- i’m never above 220
- dead heat break fan
- yes - my filament is deformed at the tip
- mine used to make that noise
- worn feeder gear
- maybe?
- check for plastic dust
- clogged nozzle
- sounds possilbe a partial clog could be happening
- abraded nozzle
- sounds possilbe
- cooked PTFE
- materials
- filament getting wet
- nahh; i’ve just changed rolls, bnut, thios wasn’t a problem
- filament getting wet
- electronics
- burn connectors
- intermittent faults
- maybe … probably not
- thermal runaway
- alreadyfine; i had that go off before
ey.95 / hagthor-barracks-main
from 94-02 - lower fan speed? - lower print speed?
ey.95-01.hagthor-barracks-main.5doh15m.549g
- fan speed inital to 40% (was 50)
- print speed to 40mm/s (was 50)
- brim distance to 0.1
…
lost adhesion AND printer clogged with a “bug tip” again
ey.95-02.hagthor-barracks-main / cooler
2022-07-22
back on my roll-slips
- print speed to 30mm/s (was 40 down from 50)
- bed to 57.5 (was 60) then 60
- nozzle to 195 (was 200)
ey.95-02.hagthor-barracks-main.6d2h50m.549g
“bug foot” clog after 1:03
ey.95-03.hagthor-barracks-main
- inital layer flow to 90 (was 100)
- temp to 190
- initial plate temp 55
…
“bug foot” clog after 1:22
ey.95-04.hagthor-barracks-main.4d23h54m.548g
- temp to 185 then 195
- initial bed temp 50 then 60
- print speed 40mm/s
- initial print speed 35mm/s (was 20)
- initial fan speed 60 (was 40)
heeyyy; is it clogging on layer0 because it slow?
…
i lost adhesion, and, the was a sudden clog at 0:30
not quite a bug foot … interesting
i think teh bed should be hotter, the fan should be slower, and that the nozzle should be 190 then 200 with inital speed 35
ey.95-05.hagthor-barracks-main.4d23h54m.548g
- temp to 190 then 200
- bed temp just 60
- initial fan speed 50
…
was fine at 0:20 or 0:25 but by 0:33 it was surely jammed
ey.95-06.hagthor-barracks-main.4d9h20m.548g
- temp to 220 always
- initial print speed 40mm/s
- general print speed 45mm/s
- wall/top/bottom 30mm/s
…
bug foot a 0:44
didn’t check earlier
ey.95-07 (reprint of ey.95-06.hagthor-barracks-main.4d9h20m.548g)
i moved the nozzle to be farther from the bed
the print … seemed to work for longer … maybe?
0:55 - gave up
slight peeling left, near
ey.95-08
- noz temp to 200 always
…
adhesion failed
ey.95-09 (reprint of 08)
trying 08 but with a slight twirl to near/left spring
…
adhesion failed
ey.95-10 (reprint of 08)
- nopzzle temp to 210 (by hand)
…
after 01:10 there was a lot of skipping
i tried forcing it through at turning the temp down to 200
…
i still hear some skipping, but, overall it’s better
there’s a lot of peeling - think that the brim should be enlarged
…
it clogged; feels defo better tho
did a “cold pull” and the tip isn’t “bug foot” it’s just thick
i’ll try 08 again withouth the enclosure
ey.95-11 (reprint of 08 - but - i updated the save file)
no adhesion
ey.94 / pageant cover / 2022-06-25
another carrying case
my sort of “priority” is to get the carrying cases done for the underworlds warbands that i’m sitting on.
THEN hagglethorn … then a dungeon?
okay ; for now the only STL i haven’t printed is the dreat pageant’s cover
i’m using the non-lid version
ey.94-01.pageant-cover.15h21m.73g
going to decrease the brim width to 3 (from 6)
keep all other details as-is and PRAY FOR SILENCE
…
at 1:23 i turned the speed down to 80% to see if that helps with the skipping
less than a few layers!!!
…
CLOG CLOG CLOG
ey.94-02.pageant-cover.15h21m.73g
changing “inital fan speed” to 50%
…
SKIPPING after 1:50
… and peeling …
reduced speed to 70% and gave it a push
…
around 03:30 or 03:40 the skipping has gone away (i think) so for next time …
- lower fan speed?
- lower print speed?
… iff this works
ey.93 / pageant calibrator / 2022-06-22 / FAIL FAIL FAIL
i’m trying again
92 failed because of adhesion, and, i now have very littel material left on the spool
i’m starting from the 92 settings, but, raising the bed temp
the Dread_Pageant_Calibrator.stl has 25, 32 and 40 so let’s go!
…
after the trials below … i’m confident that the 60c bed fixes the adhesion issue
ey.93-01.pageant-calibration.2h37m.14g
start temp is … all temp is 60
docker exec -ti adffd4f626fd /bin/bash

https://community.octoprint.org/t/i-forgot-my-octoprint-password-how-can-i-reset-it/215
hmm … source didn’t work … i’ll do this by hand and install octoprint later
…
ran out of filament
ey.93-02
reprint
…
installing octoprint aborted this
ey.93-03
reprint
…
it’s clogged - not sure why
…
upon further instpection …
the nozzle seems to be clear
the “swollen” part is pretty high up
i was able to remove it without cuttign the PTFE tube
this is … odd … welcome, but, odd
ey.92 / underworlds token box / 2022-05-24
this; https://www.thingiverse.com/thing:3143721
i have 65g of material left
i’m trying to work on a fine-detail profile
ey.92-01.nightvault-box.12h53m.55g
starting wiht super quality, but …
- initial layer height .32
- brim adhesion
- width = 6 (up a tad, but, i don’t think it’s needed … but rather be safe the )
- distance = 0.2 (down a bit because it did seperate on 91-02)
- bed temp 55 (worked on 91-02)
…
noticed that the purge line is joined to the brim - implies poor adhesion
heard some skipping and “helped it” which seemed to push past the issue
will have to check again
ey.91 / purifier cover / 2022-05-23
ey.91-01.purifier-cover.10h22m.79g
there seems to be 150g of material left
i am hoping for the best
…
print failed adhesion pretty early on and became spaghetti
there’s an odd “slag wad” that might be where the thing picked up
it’s not a jamming problem though … so that’s good.
adhesion is supposedly harder with glass beds, and, i’m using the stock temperatures (which assume fiberglass bed)
ey.91-02.purifier-cover-top.2h27m.21g
i’ve got an “old” top, so, i’m going to “hobo it” and print the missing section/range then hot-glue them together.
it’s going to take 21g so … let’s just bump the temperature up to 55
if that doesn’t work i can try aqgain on this spool
…
durring setup i noticed that the cointrol cable may have bent over and reached the build plate
- control cablew knocked print loose
- plate adhesion failed
either way … i’ve not been watching the print so it could happen again :|
…
there was warpiing - d’oh
the far corner is warped. the print was fine otherwise
// the 72mm we don't needneed
height = 72;

// lol - whatever; these just have to cover the item

width = 230;
depth = 40;

difference()
{
    import("MYARIS_PURIFIERS_cover.stl");

union()
{
    cube([width, depth, height]);
    translate([-width , 0, 0])
    {
        cube([width, depth, height]);
        translate([0, -depth, 0])
            cube([width, depth, height]);
    }
    translate([0, -depth, 0])
        cube([width, depth, height]);
    }
}
ey.90 / calibrator / 2022-05-23
i’m restarting from scratch
i’ve tried to avoid super-jamming the bowdern tube into the nozzle; maybe that was where the source of clog/tension was
trying just the/a calibrator model
- initial layer height .32
- brim adhesion
- width = 4
- distance = 0.25
ey.90-01.purifier-calibration.1h5m.8g
…
… and it worked.
wow.
okay, there’s like 150g of filament left, so, let’s use those settings for a cover
ey.89 / purifier cover (failed)
This is the cover for my “purifiers holder”
ey.89-01.purifier-cover.12h23m.80g
Based on the last prints, I; - set build plate temp to be 60 forever - this was something i did by hand - initial fan speed to 50% (was 0) - this was also something i did by hand - regular fan speed at layer 3 (was 4) - this is just normal - print speed back up to 50 (was 45) - in hindsight … maybe this was the last straw?
Printing started “fine” so I went to bed.
….
Overnight, the printer clogged/jammed and the nozzle was a few CM above the end of the model. I stripped the hot end, but, I didn’t see a good way to get the nozzle clean. I changed the nozzle and suspect that the “stock” nozzle wasn’t really 0.4mm as it seems smaller.
ey.89-02
I changed the nozzle - I swear the offical one seems to be smaller than the 0.4mm - and - it is unmarked. This iteration of the print didn’t even make it first layer - but - cleaning out the failure wasn’t as hard this time. I’ll need to re-level the bed.
reading
I read an article to try and come up with possible fixes.
- https://all3dp.com/2/ender-3-extruder-skipping-troubleshooting/
- my bed is level
- maybe replace springs?
- it’s a fresh nozzle
- have dug old slag out so it should be fine
- “print slowly”
- … yeah …
- check the temperature
- hekk it; i’ll try 200 next
- check the ptfe
- i’m about to do that; use an old throat to get a close cut
- replace the extruder
- this one …
- my bed is level
I realised I can use the old nozzle’s “throat” as a guide to slice the PTFE evenly.
ey.89-03
I turned the nozzle temperature up to 200c to try and resolve the issues. Printing was fine for awhile. At/around 40:00, the print started to skip again. I tried “hand pushing” the filament, and turning the speed down to 80%.
Eventually the print became fully clogged on/at/after layer 6 (I counted by eye) so that’s that. This time … there’s residue on the nozzle, possibly around the threading - I suspect that it either wasn’t screwed in enough OR my measuring didn’t ahve the PTFE meeting the nozzle itself.
planning
- replace the sxtruder clamp and/or gears
- replace the hot end fan
ey.88 / beastgrave (despoiler + hunt) covers
trying to do them together … because life has been too easy the last few days
together= 19h13m
9h13m 9h50m
ey.88-01.beastgrave-covers.19h20m.110g
started right after the last one
2:??:
jammed
88-02
using the last model
tride to weezle the nozzle clear
hoping a by-hand 60 bed temp fixes it
0:57:0
no clicking and was bed adhered
2:01:
it’s been skipping off and on for awhile now
advice is now … that it’s probably never been heat creep …
interlude; the fix?
https://www.facebook.com/groups/Ender3dp/posts/922631661878503/
fb says … - Make sure the hot end is actually assembled properly - I’m betting it’s a small gap between the PTFE tube and the nozzle. - Disassemble the nozzle, and the PTFE fitting up top. Cut the PTFE perfectly square with a sharp blade. - Screw in the nozzle finger tight then back it off 3⁄4 a turn. - Insert the PTFE tube through the fitting (screwed finger tight then back off 3⁄4 a turn) up top until it contacts the nozzle. - Then tighten the fitting w a wrench and tighten the nozzle. The slack originally created with backing off both sides 3⁄4 a turn will now be mashed tight ensuring good contact. - Heat up the nozzle to 260 and retighten again. Should be good to go.
i consider this “actionism”
…
i did it anyway
looks like the stock tube isn’t even
hoping smooshing everything a bit will fixit
88-03
same file as before
turned bed down to 60 again
….
the cable loosened the bed screw so i had to re-level it
88-04
same file as before
will turn bed down to 60 again
not even bothering to clean off the nozzle
….
some skipping
found and raised “fan speed”

….
it came out eventually … okay … i think.
feels a bit thin, but, that might be the design
ey.87 / myaris purifiers holder
ey.87-01.purifier-holder.1d0h13m.133g
started from ey.86-02
made brim 6mm (from 4mm)
arranged model to avoid the bad corner
….
seems to be coming along smoothly
have i landed on the correct settings?
…
it printed great!
ey.86 / sepulchural guard cover
ey.86-01.sep-guard-cover.7h50m.49g (failed)
brin distance to 0.18
bed temps to 60c
24:00:
print seems fine and un-jammed
…
skipping and peeling
ey.86-02.sep-guard-cover.8h33m.50g (current)
extended brim itself from 3 to 4mm
initial layer build plate to 65
turned print speed from 50ms to 45ms
…
near-left corner peeled quite dramatic, but, print is otherwise fine and functional
is this an issue of print footprint size?
will try next print arranged to avoid this corner with more brim
brim did come away fine AND was attached when print done
ey.85 / dread pageant holder
this one is much “taller” and I concern that cover is/may need MODDING
ey.85-01.pageant-holder.23h29m.141g
brim distance from 0.25mm to 0.16mm
raised build plate temperature to 67.5 or 65 on initial layer
…
got jammed with clicks at 01:28:00
ey.85-02
same file as ey.85-01.pageant-holder.23h29m.141g
put the initial layer temp down to 60 with octoprint
… neglected to do it for later layers (at 00:50:00)
1:30:
after 01:30:00 more clicks - not clear if jammed
turned speed down to 75% and bed temp to 60
2:00:
after 02:00:00 the clicking seemed resolved, so, i turned the speed back up to 100% (let’s see what happens? plz let it be the bed temp)
2:36:
around 02:36: skipping, but, still moving … so … i turned nozzle to 200
02:54:
more skipping. still moving. back to 195c and 80%
03:12:
skipping seems resolved by slower speed
shall i just always print at 80%?
04:57:
turned up to 90% as no clicking present
06:51:
no clicks so far … is 90% the sweet spot, or, is it a case of needing a slow “2nd to later” layers?
done
it finished “well” and i’ll start the next one now
ey.84 full skelaton holder
i’m redoing the skeletons holder
this time … with card pockets!
(i should not have forgone the pockets)
ey.84-1.skele-holder-full.18h38m.107g
reusing the previous print’s settings, but, with no supports
…
as it nears completion, i notice peeling again
ey.83 / boar expeirment
mostly testing to see if the OLDHAMMER orks can sit on it
will someday do a resin print
ey.83-1.exper-ram.1h6m.4g
- added normal support
- brim tistance to 0.25
…
worked out pretty good.
very good.
some peeling ona hgoof, but, that’s hardly a problem - will need to upsize the goat slighly though
ey.82 / (new heater) Skaeth’s Wild Hunt Holder
replaced the whole hot-end
might have been a borked sensor before i tore the heater cable by accident
heatint seems faster … and more steady now - less jagged waves!
ey.82-01.skaeths-holder.19h41m.120g
looking at thre recomendations for my brand (and starting from 81-11)
| group | item | old | new |
|---|---|---|---|
| material | |||
| plate | 55 | 60 | |
| nozzle | 185 | 195 | |
| keep to make stronk | |||
| wall | |||
| alt xtra wall | false | true | |
| z seam align | back | sharpest corner |
ey.82-02.skaeths-holder.19h41m.120g
i saw some peeling, so, i aborted.
it was just the brim.
i tweaked the bed temp to 65 (it’s a glass bed after all)
… the “purge line” isn’t adhereing - but - i think that the rest is … fine?
…
there’s some peeling on the more-narrow edges, so, for these holders i’m going to move the border(s) back in
…
some unsteadiness for the first few layers, but, the final print is “fine”
ey.81 / Skaeth’s Wild Hunt Holder
ey.81-1.skaeths-holder.19h47m.120g (skipped)
stuck with the 65⁄65 bed temp
…
need to change the spool before i start.
i’ll do that tomorrow.
ey.81-2.skaeths-holder.20h59m.120g (failed)
when i changed the spool i found a “fat head” so there’s that to deal with
also left a hair down the cable … idk …
the model didn’t fit in the volume, so, i shifted it … which added an hour to the print time …
…
skipping after 1:34 - but - i see no missing … maybe it’ll pass? why does it do this?
…
after another hour? half? the nozzle is a few mm above the print and the spindle hasn’t spun
the filament has fat-head and it was really long; had to clip the bowden to get it out
ey.81-3 (ey.81-1.skaeths-holder.19h47m.120g)
noted that 81-2 was ALSO too big, so, i’m using 81-1 since that was quicker in the estimates
… i … did spin up 81-2 … hope that’s not a problem. nozzle never started heating.
…
fathed heat clog
ey.81-4.skaeths-holder.19h47m.121g
reslicing with 60 bed and 195 filament and 100 initial layer flow
…
2:42:00 and there’s skipping … possibgle jam/clog
…
in a hail-mary attempt i turned the heat up to 210 and it seems … flawless … maybe …
210 end 60 bed might be the magic number … maybe … it looks fine when i awoke
…
most of print was fine, but, tore the bottom off because it was so under extruded
ey.81-5.skaeths-holder.19h42m.120g
DECADENCE; layer 1; 205⁄65 layer n; 210⁄60 brim wiDE; to 4.0 (from 8.0) brim distance; 0.25 (from 0.1)
after 01:13:00 it’s skipping. raised temp to 215 to see if that helps … else … i’ll reslice with 210⁄60 all over
…
yeah … yeah it’s fat-headed
had to strip and clip the nozzle
ey.81-6.skaeths-holder.19h42m.120g
all layers 210⁄60
otherwise the same
… oh; no more size warnings i guess
…
it’s clogged fully
Diagnosing "fat head" jams.

I'm not sure what's happening with my printer (Ender 3, glass bed, cardboard enclosure, Eryone PLA) sometimes it works "fine" other times it's just a repeated disaster.
Every print seems to have swollen filament in the extruder afterwards.
I've changed the nozzle, but, that didn't seem to matter.

I've assumed that it was a "heat creep" issue, tried printing on a 190 lower temperature and it clogged much sooner and worse.
I turned the heat up (mid-print, to 210) and the rest of the print came out perfect.
I tried redoing the same print with 210 throughout and ... it clogged again on an early enough layer.

How do I fix an Ender3 that keeps getting PLA so thick at the tip that it gets jammed?
https://www.reddit.com/r/ender3/comments/tsnnsq/diagnosing_fat_head_jams/
https://www.facebook.com/groups/Ender3dp/posts/912551672886502/
really fixit this time?
… … days later …
it’s another fathed
i’m nto sure what’s what - but - there was some tray goop past the tip … maybe that’s it?
maybe i need an all-new ptfe tube?
i have the blue tube(s) BUT the hole isn’t centered. i’ll try it (seemed fine in testing) but it has to be full length
… should also get
ey.81-7 (reprint of 81.6 with new tube)
i used an extra long tube
…
87 minutes later … it clogged.
i know that 185 melts the PLA fine … so … so I’m going to reslice the model with that
ey.81-8.skaeths-holder.19h42m.120g
nozzle is just/alwasy 185 - here’s hoping
…
something went wrong and the filament hadn’t reached the nozzle … i suspect it was from scraploading
ey.81-9 (reprint of ey.81-8)
let’s try them apples
(didn’t clear scrapload tho)
…
stuck again after 67 minutes - looks like a mushroom-head
ey.81-10
temperature at 185⁄50
… printer says “no?”
ey.81-11
temperature at 185⁄55
brim distance to 0.5
Error reported by printer
Your printer’s firmware reported an error. Due to that OctoPrint will disconnect. Reported error: Heating failed, system stopped! Heater_ID: 0 - Printer halted. kill() called!
… I think that the heater is fooked …
ey.80 / Grashraks Despoilers Holder
i built a chomp, but, decided not to use it
ey.80-1.despoilers-holder.18h58m.116g (failed)
printing with no “cleaning” or stripping … maybe the snag the other day was due to the cancel/restart?
it peeled!?!?!
ey.80-2 reprint (failed)
nozzle heat-jammed
ey.80-3.despoilers-holder.18h58m.116g (success)
reslices but with 72.5 the whole way through build plate temp
…
i think it jammes; i’m going to reslice with 65⁄65
…
it stopped jamming … goodness what a good litte gif
ey.80-4.despoilers-holder.18h58m.116g (unused)
has 65⁄65 bed temp to try and reduce heat creep
ey.79 / SEPULCHRAL_GUARD_holder
ey.79-1.sep-guard.10h21m.60g (skipped)
removed the card storage to see what that got me
won’t be an option for all the holders
… at the last minute, i decided a 9mm holder (instead of whatever) would give me some space BUT that might not be enopug so HEKKIT FULL FAT
ey.79-2.sep-guard.18h20m.106g (cancelled)
u decided i wanted the “small” one
ey.79-3.sep-guard.10h25m.59g (failed)
nozzle clog; heat creep.
i did a strip and clip.
ey.79-4
retry of ey.79-3.sep-guard.10h25m.59g
…
whole first layer was down this time
…
it worked with some flaws, but, it’s usable
- under extrusion in a specific area
- greebling
- flawed adhesion in a few areas
ey.78 / tower spire
just the spire - due to talks with mum
ey.78-1.hag-tower-spire.67g.17h6m
???
did i ever print this?
ey.77 / third gthanatos carousel
i broke a paint carasoul, so, i’m making a new one
https://www.thingiverse.com/thing:2436687/files
ey.77-1.gthanatos-carousel3.49g.8h30m
starting with 76.2
- set layer to 0.16 for speed
- set infill to 20%
…
flawless!!!
i levled “by eye” rather than with the measures and got very close
i still used the motors to move the plate … but … i think this is the way
ey.76 / redux barracks-main
starting from, ey75
barracks-main
ey.76-1.tower-base.306g.3d11h41m
initial layers were fine
adhesion failed around the edge by … 3? layer
fear it’s an issue with the hot plate
ey.76-2.tower-base.307g.3d11h49m
halved the brim distance, doubled the brim width
…
USB failure paused it
ey.76-3
tried to reprint, but, seems to have collapsed and lost adhesion
need to do a breakdown of the hot-end
…
post breakdown levelling makes me think that i just need to start putting the bed closer tot he nozzle
ey.75 / single-disc
ey.75-1.single-disc
- start from 72 (lost file)
- using new model
- cleaned bed off
- initial layer height to 0.32
- bed temp to 75⁄70
- just that one disc
…
didn’t adhere, just stuck to the nozzle.
ey.75-2.single-disc
same
…
print was perfect with the gold slip as calibration
did i have gunk on the nozzle before?
ey.75-3.single-disc
enlarged
…
perfect
ey.74 / chet-test
ey.74-1
move nozzle back up to 200
ey.74-2 / test model
neurotic levelling
ey.74-3 /
0.1mm levelling (ish - the blade slides under freely)
bed down to 65
initial fan at 65
…
change the tube in the tip
….
nope! no adhesion
how to get adhesion with a glass bed
ey.74-4 /
fan layer 0 = 0% full fan at layer 2
i turned the fan on because of jamming which i attributed to heat creep
i’ve replaced the PTFE-throat … so … if that’s “fixed” the clog, maybe, i need the fans off for adhesion?
…
initial lines looked “fine” then failed
ey.74-5
tried the last one again - but - i used hairspray this time
….
no adhesion
ey.74-6
trying 74-4 again, but, with glue stick
…
partial failed adhesion
ey.73.haggle-barracks-main
ey.73-1.haggle-barracks-main.3d14h9m.314g (failed)
same settings as before - just with more prayers and no hairspray
….
failed once via peeling
…
failed again via nozzle clog
ey.73-2.haggle-barracks-main.3d14h7m.313g
- brim wide to 0.2mm (was 0.1)
- brim wall to 3.5mm (was 4.5)
- initial layer flow to 80% (was 85%)
- nozzle to 190/195/190 (was 200)
no adhesion at first try
ey.73-3.haggle-barracks-main.3d14h7m.313g (current)
- nozzle to 200/195/190
- bed looks level
- hairspray after bed heated
failed with peeling
ey.73-4.haggle-barracks-main.3d14h7m.313g
tightebned screws near me a notch and GENTLY waxed with glue stick
…
failed because of … ???
ey.73-5
went back to ey.72
… hey ; i should re-numvber these?
i renumbered them
ey.72.haggle-barracks-roof.17h58m.61g (success)
based on fb-feedback;
- 70c layer 0 bed
- brin distance ot 0.1
- brim width 4.5
- ~ 0.2mm level
- hairspray
- alchol cleaning
- 0.206? level
17h58m for roof
3d14h7m for full barracks
i’m printing the roof next
543g at start
…
i checked “midway” and … the changes seem good!
… but - i’m out of hairspray
ey.71.tower-base-supports.2d9h0m.205g (actual 211g including failure)
spool weighed 754g at start
i’ve had supports enabled this whole time … oops
i adjusted the brim to be at 0.3mm instead of 0.6mm
i really want to turn down the bed heat, but, elephants won’t matter on this print
i want a “sloped ironing” setting, but, that’s not an option
… actually; the last time i printed this i DID use ironing AND the printer had a heat clog afterwards. time/heat-creep are the issues with ironign PLA, right?
…
had a peeling failure
restarted - peeling again
i’m going to post on fb and reddit … i wonder how long it’ll take before someone says the gluestick is damaging adhesion
https://www.reddit.com/r/ender3/comments/swdte7/warm_or_cool_for_later_adhesion/
https://www.facebook.com/groups/Ender3dp/posts/886441525497517/
warm bed or cool bed for continued adhesion?

after my first few layers ... my prints peel off the Ender3 glass bed.
i'm using glue-stick, and a thick first layer; skipping either fails adhesion at the start.
later in the print (before layer 10ish) the print will peel back from the build plate.
i'm levelling with a 0.254mm spacer - i tried 0.356mm and the first layer didn't stick, and, 0.102mm and the nozzle got backed up enough for a heat-creep.

the bed is on 60 all the way through.
so ... should it be lower on later layers to avoid peeling?
…
hmm … hmm … there was more peeling on the back
ey.70.mollog-cover.12h56m.65g (actual 59g)
813g
did a backslash
leveled the bed to be buzzing on the knife-ruler
leveled before and after waxing the base
…
there was a single warped corner
the result doesn’t fit smoothly; is that because of the rotation and some dimensional inaccuracy?
result is acceptable
had 754g at end
ey.69.mollog-holder.1d2h44m.126g (actual 107g)
gonna level with the 0.254 and slather on the glue
ey.69.mollog-holder.1d2h44m.126g
ocotprint says it’s too big, but, tried it when i said “DOIT”
the results seem fine
…
some cosmetic peeling on the front-right which might be a first.
i’ll do future longbois at a “backslash” angle
813g afterwards
1000 - 80 = 920
920 - 813 = 107
ey.68.zarbags-cover.13h8m.63g (actual 80g including failures)
it this; https://cults3d.com/en/3d-model/various/zarbags-gitz-warhammer-underworlds-storage
feels a bit wasteful to print this … but … the snapping cover should be good
it’s aboiut £1.30 of materials
…
some way through it starte clicking
i adjusted by lowering the bed. looks fine.
i turned the nozzle up to 205 and the speed up to 110%
…
late night; the printer had fully clogged. i think that the filament has worn thin - so - the drive isn’t gripping it anymore. i’ll strip and clean it after work - here’s hoping i don’t have to cut the “white” ptfe tube with the blue tip i put in
…
strip was fast
restarted with 0.356mm slice
failed after 3.5 / 4 hours
had nozzle gunk
…
cleaned and leveld with 0.254mm they slathered glue on
finished fine … i think … there seems to be a weird tilt thing
consumed 80g of filament including failures
Eryone - 2
I bought a second spool of this stuff.
ey.67-1.zarbags_resume.8h15m.34g
i used OpenSCAD to slice off the bottom and print the rest
new-Cura didn’t “like” some of the overhangs … but … it worked out in the end.
it this; https://cults3d.com/en/3d-model/various/zarbags-gitz-warhammer-underworlds-storage
i also want;
- (free so next) https://cults3d.com/en/3d-model/game/mollog-s-mob-holder
- https://cults3d.com/en/3d-model/game/beastgrave-storage-grashrak-s-despoilers-sample-for-warhammer-underworlds
- https://cults3d.com/en/3d-model/game/skaeth-s-wild-hunt-beastgrave-storage-calibration-tool-for-warhammer-underworlds
- https://cults3d.com/en/3d-model/game/sepulchral-guard-warhammer-underworlds-storage
- https://cults3d.com/en/3d-model/game/elathain-s-soulraid-calibration-tool
- https://cults3d.com/en/3d-model/game/dread-pageant-w-u-storage-with-card-lid
- https://cults3d.com/en/3d-model/game/myari-s-purifiers-direchasm-calibration-tool
ey.66.ZARBAGS_GITZ_holder.1d3h20m (soon)
i looked at doing it as thicker layer lines - but - that led to areas that’d need supports
with the 0.12 lines it needs no supports
…
first attepmt was peeling at the edges; restarted with hairspray and a slight tightening … along with movign the curtain closer/snuger
…
a third attempt worked up until about 41mm where the printer threw up a “serial bus” error and just stopped
ey.65.Hagglethorn-Homestead-Base-v1.4 (reprint - current)
ey.60 was the last “fine” one so … let’s go
i’m reprinting the bottom for an existing model
i’ve got all the models up to date
…
calibrated with .106 knife measure
…
print failed; nozzle was blocked.
i stripped the nozzle, clipped the tube and re-tried
…
it failed again and i stripped the nozzle fully - no visable leakage
when i clipped the tube this time, i put about 2cm of “blue tube” in the throat such that if it gets another “heat swelling” i can try to just replace the small tube instead of continually shortening the main bowden tube
it’s been on for 15h08m and … it fine?
i used hairspray!
ey.64?.rough-stone-tile (???)
my scaling stuff keeps evapurating? maybe i’m saving/loading the wrong file?
| size | scale | time | weight | length | support |
|---|---|---|---|---|---|
| 126x126x90 | none | 5h32m | 22g | 7.43m | normal |
| 126x126x80 | y+60 | 5h32m | 25g | 8.38m | normal |
| 126x126x80 | y+60 | 5h32m | 25g | 8.38m | normal |
| 126x126x80 | y+60 | 6h26m | 21g | 7.14m | tree 0% |
| 126x126x80 | y+60 | 7h55m | 27g | 8.92m | tree 10% |
| 126x126x80 | y+75 | 7h56m | 27g | 9.06m | tree 10% |
ey.63.Hagglethorn-Tower-Base-Supports-v1.2 (complete)
ey.63.Hagglethorn-Tower-Base-Supports-v1.2
- nozzle to 195
- this is the cura profile for eryone
- ironing
- this was sugested for uinrelated reasons on an unfrent print so i want to see what do
- using concentric pattern
- have to iron all the time - ionly toipo layer no good
- later bed to 55
- i suspect this will make it work?
neat; https://www.youtube.com/watch?v=gh5wC4Ti95s https://www.youtube.com/watch?v=CzW45MphcK4 nahh; https://www.youtube.com/watch?v=9otlFHhmZkY
…
after 3h15m seems still fine
…
at around 4 hours - it started peeling
the rest of the print finished fine, but, the one edge that peeled vexes me greatly
the ironing gave everything a flat and stupid finish; i’m not in love at all
also of note (and quite distressing) the pegs to attach the two pieces didn’t print - i’m a bit worried wither that was ironging or the printer jamming after ironing that whole top layer
ey.62.Hagglethorn-Tower-Base-Supports-v1.2 (FAILED)
next int he serries - done with normal ey.60 settings
- inital layer flow 85% -> 80%; reduce clicking?
- it was only happening at the start
- i assume that the first few layers were causing backpressure
- … and that the non-thick followups didn’t cause same proiblem
- … or that the later layers had interior gaps where the presure could overlfow
- brim width 4->3 ; save filament?
- brim distance 0.6->0.5; save filament?
…
leveld with the card; no good
aboted - bad adheasion
…
eleveled with the wine coupon folder, and, put down glue stick
aborted - nozzle jammed
…
leveled with card
aborted - adhesion (possibly on unglued area) failed and peeled
…
washed bed
leveled by eye
hairspray
doing fine after 1h22m though
failed - i’m reslicing
ey.61.rough-stone-tile (failed)
i’m trying the eryone filamet profile
i’ve rotated the tile 45 to try and deal with the elevation lines on it
i’ve also enabled normal supports in Cura
… a “better” solution … might be to split it like a sandwich before printing; all angles would be at 45, right?
no … no thjat won’t do it since the insides will have islands
i’ll scale up tp 32mm tiles (the design is 25.4) 32⁄25.4 = 1.25984251969 = 126%
| change | amount | time | weight | length |
|---|---|---|---|---|
| upscaled to 32 | ?45 | 8h39 | 28g | 9.35 |
| started at 25.4 | ?45 | 4h40 | 16g | 5.24 |
| 126x126x70 | y+45 | 5h28 | 20g | 6.65 |
| 126x126x60 | y+45 | 4h28m | 15g | 5.11 |
i calibrated with the bugman’s card
| change | amount | time | weight | length |
|---|---|---|---|---|
| 126x126x70 | y+45 | 5h28m | 20g | 6.65 |
…
failed once - tried again levleing with wine coupon
…
failed again - worked ebtter though?
seemed to “fail in mid air”
- maybe steeper?
ey.60.Hagglethorn-Tower-v1.3
floor 3 and top floor of lighthouse were the last “good” ey prints
… and the haggle mini … i guess
reinstall/update Cura … later
ey26?
temps are 200⁄60 across the board and iv;‘e got the first layer thing going
ey26 looks … fine … but; i’m doing “sharpest corner z-alighn”
… and “alternate extra wall”
going to do the “Hagglethor Tower” as it’s the next part that’ll stand alone
…
i levels with the wine recipt folder over - then - i put gluestick on the bed
the first 2/3/4 layers had clicks i started running it at 90%
later, durring layers with infill; that seemed to go away
ey.59 / aq.54.paint-carousel.tray
There were adhesion and nerding problems. I’m starting to think that I should tune to a brand and stick with it.
…
weird; looking back this doesn’t have the settings ie expected.
ey.58.Hagglethorn-Homestead-Roof-v1.6
I’m starting from design 53 but not bothering with weighing everything. I’m going to forgo supports and use the/a pre-supported file.
https://www.facebook.com/groups/Openlock/posts/1259185271224175/
i’ve lowered the speed from 45 to 40 (default is 50)
|ey.58.Hagglethorn-Homestead-Roof-v1.6 |2d16h43m|173g|57.98m| — | — |
…
There seems to be a lot of nerding … maybe even some under-extrusion on one of the details.
AnyCubic
AnyCubic is a brand that I recognise and was on sale when I was running out. It still seems to be on sale … but … I’m unsure if I want to buy more of it. It’s been an “indecipherably nicer” experince than the basic filament I consider a baseline, but, I’m not sure if that’s down to my understanding of 3D printing or any actual product quality.
I worry that the filament needed a higher temperature which led to heat-creep.
…
oh; here’s some notes that aren’t relevant anymore
first note (for me) is that i need/use portainer to manage … stuff …
docker run -d -p 8000:8000 -p 9443:9443 –name portainer –restart=always -v /var/run/docker.sock:/var/run/docker.sock -v portainer_data:/data portainer/portainer-ce:2.11.1
docker volume create portainer_data docker run -d -p 8000:8000 -p 9443:9443 –restart=always -v /var/run/docker.sock:/var/run/docker.sock -v portainer_data:/data portainer/portainer
project model name cura time cura weight cura length weight at start weight at done aq.55.jigsaw-blade 15m 2g 0.54 — — aq.54.paint-carousel.tray 5h30m 23g 7.71m 190g 160g / 172g aq.53.lighthouse-base-b.60 12h35m 57g 19.12m 237g 190g aq.52.lighthouse-base-b.trees60 16h45m 74g 24.96m 306g 237g aq.51.lighthouse-base-a.trees60 20h08m 76g 25.32m 365g 306g aq.47.bulbasaur-normal 9h05m 37g 12.41m 420g 385g aq.46.tube-cutter 2h11m 8g 2.79m 428g 420g aq.45.lighthouse-1 1d12h34m 110g 37.02m 520g 428g aq.44.brazier 1h3m 4g 1.19m 521g 520g aq.40.quad-shaker 15h31m 101g 33.70m 582g aq.42.anvil-pair 17h49m 53g 17.82m 623g 582g aq.41.haggle-base50 7h55m 29g 9.59m failed aq.39.haggle-tops 2d9h24m 164g 54.91m failed aq.38.spray-frame-stronk 11h8m 45g 15.15m 721g 677g (37) aq.35.blck-scrl.lttl-cottage2.50 12h21m 32g 10.75m 786g 758g aq.36.spray-frame 2h53m 28g 9.28m 806g 786g aq.34.blck-scrl.lttl-cottage1.50 ??? 34g 11.38m 836g 806g aq.29.lighthouse.floor-3.corrected ??? 90g 30.07m 1065g ??? aq.28.lighthouse.floor-3 ??? 106g 35.43m 1150g 1065g
aq.57.shaker-one
let’s see …
i’m trying an “all in one” shaker structure - not sure about it. saved the file as my “strong” settings. can’t weigh the filament due to the tension in the coil messing up results. measuring “loops” instead since it’s all i can get.
| project model name | cura time | cura weight | cura length | weight at start | weight at done |
|---|---|---|---|---|---|
| aq.57.shaker-one | 3h13m | 12g | 3.91 | 18 loops | — |
…
it worked, but, it looks flimy as heck
i’ll go with epoxy and a saw blade
aq.56.jigsaw-blade2
just revised one
the shape is good/better/fine but i’m starting to wonder if I can/should just print the whole shaker.
aq.55.jigsaw-blade
I need a new “jigsaw attachment” for my paint shaker. There is a blade that I will use for attachment. I have modeled an approximation of the blade and will print it. I expected it’ll be a “good” print for the last of the filamment.
|aq.55.jigsaw-blade|15m|2g|0.54| — | — |
The project file is in hg - unusual but this one isn’t crazy big so it seemed like a good idea.
…
The “neck” seemed too long by 2mm and the nect was too wide by 0.5mm.
aq.54.paint-carousel.tray
Thing Link; https://www.thingiverse.com/thing:2436687
I have a small amount of filament left on the roll - so I chose to print something small; another tray for the paint racks that I use. This came out perfectly - no skipping and smooth. I now have quite a collection of these little guys … but it’s never enough.
The total spool weighs between 160g and 172g left - the struggle is that the tension from the coiled filament pushes down on the scale when I weigh it. The spool itself weighs 138g so I might have enough filament left to do another one of these … especially if I “scrap load” it or “hot swap” some older lengths of material mid-print.
| project model name | cura time | cura weight | cura length |
|---|---|---|---|
| aq.54.paint-carousel.tray | 5h30m | 23g | 7.71m |
aq.53.lighthouse-base-b.60
These were the final pieces of the lighthouse. I didn’t use any supports on it, and, I kept the “scale down” at 60%. While I do adore the results of all three pieces … I’m sad that I lost the “tilt” that was there.
When I started there was 237g of weight on the spool. Cura thought that it was a 57g print - so that’s good as long as it works. At some point early in the print I heard skipping - I don’t remember how many layers in I was. I was able to “help it through” and the skipping seemed to stop - I should pull apart the hot-end and check, but, I don’t want to.
I think that I’ve developed a “fear” that anytime I take the machine apart, the next print/s will fail. This likely stems from the fact that I only take the machine apart when it’s already failing. This is something that I would/should overcome with CBT - but … I don’t want to deal with it.
I’ve heard the word that an “all-metal motor” can fix skipping. The justification is that the metallic parts last longer - so must be better. My engineer brain doubts that this is true. The parts involved in skipping are the gears that press the filament through and the motor that spins those gears. The motor and gears are already metal - so wouldn’t be affected by an all-metal-motor upgrade. The all-metal upgrade would use the same motor as well. I also reject the “what’s the harm” argument - replacing these parts would require recalibrating the machine. I would rather not recalibrate the machine.
| project model name | cura time | cura weight | cura length |
|---|---|---|---|
| aq.53.lighthouse-base-b.60 | 12h35m | 57g | 19.12m |
aq.52.lighthouse-base-b.trees60 (success)
rock-a looks … okay … so i’m slicing b
need to remember to grease the whole plate
|aq.52.lighthouse-base-b.trees60 |16h45m |74g |24.96m |306g|
…
237 at the end
aq.51.lighthouse-base-a.trees60 (success)
- raising “initial fan speed” to 50% (was 0)
- restting retraction
|aq.51.lighthouse-base-a.trees60 |20h08m |76g |25.32m |365g |
…
i bed leveled with a BugMans’ lyalty card
… and … and no skipping!
…
done at 306g
aq.50 (failure - clogjam)
start with aq.49 but - temps to 200 - retraction halved to 2.5 - retraction slowed to 35 (was 45) - flow as normal - z scale down to 60%
… temps were already at 200 …
369g spool at start
|aq.50.lighthouse-base-a.trees60|19h56m|76g|25.32m|369g|
i wonder what it’d be like scaled up to 110? could i avoid supports?
…
it stopped again after the first layer
aq.49 (failed)
i’ll start with aq.48, but; - decrease the inital layer flow to 50% - increase overall temp to 205 - increase inital nozzle to 210
if i’m right about what’s wrong; this should still be probelmatic, but, should reduce the jamming
the old spool weighs 376g right now
…
the printer is still skipping.
i “helped” it a bit and it seemed to mean the problem stop.
is there an upgrade to the ender motor?
…
not really; noboyd can really describe what the all-metal extruder does
… but i can reduce retraction
https://all3dp.com/2/3d-printer-heat-creep/
aq.48 (failed)
i think that i have 235g left - the new spool weight 1150 and the curent one weighs 385g
the lighthouse has three sections a-b-c
a has the dock and seems to be about 92g
b and c seem to be about 160g together
a at 80% with overhang = 82g, but, the underhang looks icky a at 80% with trees = 86g i guess - but i should do support blockers for the pegs/slockets
|aq.48.lighthouse-base-a.trees |23h42m |86g |28.83m |
b at 80%z with trees; 82g b at 80%z without support; 82g as well. curious
c at 80%z without support; 63g c at 75%z without support; 62g b at 75%z without support; 80g a at 75%z unblocked trees; 83g
|a-base|75%|block peg trees|82g| |base a|65%|block peg trees|77g
|aq.48.lighthouse-base-a.trees65 |20h57m |77g |25.87m |
started at 1700 so probably 1300 tomorrow
…
after a few hours, and still on the first few layers Gif clogged.
i suspect that my “super thick” initial layer is causing an issue, and, i should reduce the flow
prints with larger first layers complicate the issue by being slow to print leading to a buildup of swollen filament?
aq.47.bulbasaur-planter (future)
made in triade for trouser repairs
pixeladted; https://www.thingiverse.com/thing:2980150
sloped; https://www.thingiverse.com/thing:426645
other; https://www.thingiverse.com/thing:381599
… i’m using normal …
starting from the tower design
at 100%
|aq.47.bulbasaur-normal|14h21m|60g|20.15m|420g| ???|
at 80%
|aq.47.bulbasaur-normal|9h05m|37g|12.41m|420g| ???|
…
the 80% came out great - some nerding on the very top, but, the body looks smooth
385g left
aq.46.tube-cutter (success)
https://www.thingiverse.com/thing:686792
This should be a small tood that’s useful to have given how often i need to re-cut the bowden tube to get swollen PLA out I’ve prepared and pre-sliced it witht eh same stats as aq.45 before uploading it to OctoPrint.
|46.tube-cutter|2h11m|8g|2.79m|428g| 420g|
kind of okay - but - will need cleanup to fit the tube as it’s quite snug
aq.45.lighthouse-1 (success)
2021-10-16
starting on 520
just doing what i was doing - retraction and all
|1d12h34m |110g |37.02m |520g |428g|
…
part way through and it sounds to be constantly skipping
i’ve raised the temperature to 210 and will try to ignore it
…
2021-10-17
it’s stopped clicking (for now) and i hope that the nozzle stays unclogged
… i keep worrying about the fact that i can’t hear it
aq.44.brazier (success)
2021-10-16
i’m trying to “get back on it” starting with this thing
starting with just the brazier
i disabled retraction
1h3m
4g
1.19m
start at 1929
|aq.44.brazier |1h3m |4g |1.19m |521g |520g | 1929 |
…
okay … well … i guess that i need retraction
i had an excess of nerds
aq.43.lighthouse-1-brazier (skipped)
I’m going back to the aq.35 project
- lowere print speed to 45
- raised infill speed back up to 50
- enabled jerk control
- print temp down to 200
|aq.43.lighthouse-1-brazier |1d13h45m |114g |38.19m | ||
aq.42.anvil-pair (success)
I should have checked reddit before doing work on the printer today. I stripped the hot end and “burn out” the throat and nozzle. I also trimmed toe bowden tube as there was filament stuck in it and sludge on it. When I did the reassembly I tried to keep the throat as far out of the heater block as I could.
I also recorded myself doing all of this - so - YouTube it?
I spent a lot of time sizing the Hagglethorn stuff and preparing to print it at 40% size. I also tried to get them print-as-one with filled interiors.
I was unable to get a time estimate that I liked, so, I’ve switched to some “Maker’s Anvil” models. Going forward; I intend to amass a collection of (properly shrunk) houses for future occaisions.
I also need/want to build a tool to mangle the files myself - but - need a way to do that. OpenSCAD would be ideal, but, I kept “losing” the file(s) (somehow) and they didn’t appear in the exports. Let’s try something with PureScript and AssImp. (somehow)
In hindsight; think that I can do what I want by; - building the combined model in IceSL - exporting the foot of the model on its own - exporting the full model as well - placing both of these on the same build plate at the same location - performing the fill in on the foot-only model - adding support trees ONLY to the “full” model
… also, these were some timings I recorded
| scale | slice | fill | tree | time | mass |
|---|---|---|---|---|---|
| 50% | 21s? | yes | no | 10h37m | 37g |
| 50% | 120s | yes | 10% | 14h9m | 48g |
| 45% | 120s? | yes | 10% | 11h9m | 37g |
| 40% | 120s? | yes | 10% | 8h51m | 29g |
| 40% | 90s | no | 10% | 10h2m | 30g |
In the end - they printed with a lot of under extrusion, nerds and stringing.
aq.41.haggle-base50.7h55m (failed)
unions?
need to union; - Hagglethorn-Tower-Base-Supports-v1.2.stl - Hagglethorn-Homestead-Base-v1.4.stl
i spend about an hour adjusting the model in Blender
| version | weight | length | time |
|---|---|---|---|
| stock | 154g | 51.48m | 1d20h36m |
| partial | 193g | 64.61m | 2d13h43m |
| partial2 | 175g | 58.79m | 2d5h19m |
| stock - no holes | 133g | 44.64m | 1d9h31m |
the partial model is harder it seems … likely because of the weird garbage leftover.
not sure if fixering it’s worth the effort.
… and i just found the “no holes” setting which does it for me and saves ~14% material
so it looks like “no holes” is the way to go for this
https://www.facebook.com/groups/Openlock/posts/1184794558663247/
https://www.facebook.com/groups/Openlock
i dropped the brim distance to 0.5mm
i also scaled the model to 50% to match the others
|aq.41.haggle-base50|7h55m|29g|9.59m| | |
….
2021-09-22
started at 623g
i’m in a bit of a rush now as the party is sooner
…
nozzle is fully clogged - i need to stripit
reddit’ed; https://www.reddit.com/r/ender3/comments/pt6tu0/my_nozzle_clogged_with_a_drop_on_the_tip_of_it/
aq.40.quad-shaker (current)
https://www.thingiverse.com/thing:2684065
want a quicker print
| name | material | time |
|---|---|---|
| super | 24.44m | 15h42m |
| dynamic | 25.45m | 11h19m |
| standard | 21.00m | 8h15m |
| low | 22.36m | 6h24m |
(some support numbers with some settings)
| support | material | time |
|---|---|---|
| none | 22.14m | 8h40m |
| tree | 26.06m | 10h54m |
| normal | 39.06m | 16h2m |
turn down to “standard”
- initial layer height to 0.38mm
- initial layer flow to 90%
- 0.4mm brim width
- 0.25mm brim
- bed temp 60c
- tree supports
- support desnity 10%
- support pattern; cross
- wall count 3
- infill 25%
- infill gyroid
tried to block supports, but, the trees ignored that and planetd themselves on the main body. whatevs.
final expectations
|aq.40.quad-shaker|15h31m|101g|33.70m| | |
aq.39.haggle-tops (failed)
|aq.39.haggle-tops| | | |677g| |
plan a
gonna do; - supported homestaerd roof - cottage roof - barracks roof - barracks a supports - tower (no cap or support)
pull temp down to 200
…
there was a clog/dribble stuck on the nozzle and the print could no proceed
looks like a drop of material blocked the nozzle and printing couldn’t proceed?
if it happens again i’ll assume it’s the 200 not 205 temp and turn it up to 210
aq.38.spray-frame-stronk (success)
using a fine-print and thicker walls should “fix” the problem I had
re-modelling the arms with supports in open-scad could also help
….
mods look good
i stretched it up by 10% and made the overhang printable
|aq.38.spray-frame-stronk|11h8m|45g|15.15m|758g| |
…
tube was clogged; going forward i should turn them temp down i think
… and i forgot what the weigh of the spool was …
…
broked again - no adhesion - did i glue it?
739g
…
borked again on the corner this time.
it got further - so … i’ll set it up again later
…
clean and waxed the bead - now stating with spool at 721g
i adjusted the bed height (at the sensor) as it wasn’t great; here’s hoping
aq.37 (lies; it’s just aq.35)
re-waxed the pad
didn’t re-level
hope for good
786g at start
…
came out fine - but - too much leftover glue meant that the pirnt was stuck to the plate
found that showering it and then leaving it with “rainfall” meant that the glue got loosened
i cleaned the palte aftwards though
758g
aq.36.spray-frame (failed)
https://www.thingiverse.com/thing:4116563
restarting from “low quality” profile
raised “general” layer height to 0.32
sert inital layer to 0.38 tho
brim distance up to 0.5
brim on all sides
brim width down to 4.0
bed temp to 60c
nozzle to 205
initial layer flow to 90%
…
the item is unsuitable.
the little arms came out too weak to support an elastic ring.
aq.35.blck-scrl.lttl-cottage2.50
i’m doing another of these as the model is easy and there’s some variation
806g at start 12h21m 32g 10.75m
started at 1228
…
nozzle seems properly clogged - that’s a hassle i don’t want to deal with
aq.34.blck-scrl.lttl-cottage1.50
using the scalable version, and, just scaling it down by 50%
only printing one item at a time
increased the brin distance
836g at start
34g / 11.38m in slicer
…
print will likely complete while i’m asleep
…
806g at complete
printed fine
aq.33.lighthouse.floor-2
just the old file with floor-1 and brazier
916g on spool at start
aq.33.lighthouse.floor-2
…
i don’t know what i did right, but, print is going smoothly and not skipping
might be because the model is centered?
…
post printing; i used the bed heater to make it “detach” easily
836g at finish
aq.32.lighthouse.floor-1-2-brazier (failed)
962g to start
i thought that the nozzle was clogged, but, the cable had snapped
i rearranged the pieces - they should avoid the clip holding down my build plate
… ooh; i could store these on my google drive!
reads as 204g / 68.24m
….
top end of the bowden tube became disconneced.
i’m going to try printing fewer things at once
aq.31.lighthouse.floor-1-2-brazier
i’ve unclogged the device
i’m trying again, but, i’m turning the temp to 205 and the bed to 87.5
i also scaled the brazier to be +20% instead of +10
pre-print the spool weighte 976g
204g / 68.25m
2 days 14 hours 59 minutes
….
i aborted the print after awhile, because, it wasn’t adhering great so i wanted to add pritt
re-starting on 973g
….
there’s a lot of skipping at the early layers, but, pritt fixed adhesion
(failed) aq.30-1.lighthouse.floor-1-2-brazier
just setting up “the rest” of the print
first print spagetti’ed so i raised the temp
second pprint - also spago’ed so i’m re-uploading and applying pritt
| contents | usage | length | before | after |
|---|---|---|---|---|
| 1, 2, brazier | 203g | 68.13m | 986g |
3rd try
third looked adhered
i’m hating the new filament i think
results
nozzle clogged and the filament snapped
aq.29.lighthouse.floor-3.corrected
proper-scale the lighthouse this time
not touched the bed so let’s see
should use 90g / 30.07m
| print name | before | cura mass | cura length | after |
|---|---|---|---|---|
| lighthouse.floor-3 | 1150g | 106g | 35.43m | 1065g |
| lighthouse.floor-3.corrected | 1065g | 90g | 30.07m | ??? |
days later; i think that spool was on 986g afterwards.
this suggests that the estimates are 10% “over” what they’ll be. this is probably caused by “skipping” but it means that i can trust CURA’s estimates against the spool going forwards.
… assuming that I really got 1000g on the 1150g spool.
aq.28.lighthouse.floor-3
Change the/my EYone for a fresh AnyCubic roll. The new roll weighs 1150g.
i’m starting with the 26 file and printing the “large base a” hagglethorn model with 10% infil but otherwise “stock”
it took over six minutes to slice
looks like it will take 236g of the roll to print!
re-slicing with 4 infill steps
232g
and i can see lots of “floating” infill lines
gonna do 25% with 5 steps
| infill | steps | material |
|---|---|---|
| 10% | 2 | 236g |
| 10% | 4 | 232g |
| 25% | 5 | 274g |
| 15% | 0 | 307g |
actual print
HEKK WITH THIS - i;m doing the next part of the lightouse
the lighthouse is incomplete - so - it makes sense to “finish” it
it’s 110% tall with 10% infill and 2@5 infill
aq.28.lighthouse.floor-3
octopi says 35.46m
cura says 106g / 35.43m
….
okay … but … this is oddly not fitting?
HELLL! it’s uniformed scaled - so i need to do a reprint
spool says 1064⁄1065
Eryone
This was the first … “nice” filament I bought. It’s hard to describe or define why it was nice - it was nice.
ey.27.haggle-mini-cottage
29cm by 5.4cm
5.4cm / .175 = 30.85714285714286 5.4 / .2 = 27
so … average? 28.92857142857143
there are 28.9 “strands”
each strand is … 29cm long, or 0.29m long
16.7m
there’s about 40% of a third row … ish … so maybe 19.9m?
let’s see how lighthouse floor 3 at 10% infill estimates
28g - lolnope
hagglethorn cottage scaled to 50% seems to be within budget
let’s goooo
….
i should have queded these up for sequential printing so that any failure could be ignored
ey.26.lighthouse.floor-3
i think that i’ve gone from 5 layers of filament left to 3. i had an estimated 54 meters when i started this “lightouse” print. i now have … 33? i’m going to print more of the lighthouse, but, based on what’s left next decide wether to do paint carasouls.
|?|?| |–|–| |old calculation|54| |new calculation|33| |top floor|23.32| |roof|12.81| |calculated usage|21| |estimated consumption|36.13| |theoretical remaining|22.07|
the lighthouse floor pieces are notable different in size between 1 and 4. stretching floor-4 by 10% (as usual) shows a usage of 22.21m. stretching to 20% shows 23.70. this is looking “really” tight - i think that there was some “play” in my estimates - but - i don’t know how that worked out with these calulations.
so i need my number(s) to be under 22m if I want to be “safe” with this spool. i began experimenting with usage estimates in Cura, as shown below.
tri-hex at 15% would work, but, i don’t like that the lines are vertical only - so - i want to check ifcubic-sub-div would do it at that density
| stretch | pattern | percent | usage |
|---|---|---|---|
| 0% | cubic | 20% | 20.72 |
| 20% | cubic | 20%% | 23.70m |
| 10% | cubic | 20% | 22.21m |
| 10% | cubic sub div | 20% | 25.31m |
| 10% | zig zag | 20% | 23.87m |
| 10% | tri-hex | 20% | 22.16m |
| 10% | tri-hex | 15% | 21.65m |
| 10% | cubic sub div | 15% | 23.93m |
| 10% | cubic | 15% | 21.56m |
curious that “cubic” and “tri-hex” at 15% had transposed sub-meter amounts
…
after printing;
- something screwed up the z-axis and compressed the very top
- either z-screw or a trapped cable
- there’s NOW about 2 layers of filament left
- 29cm circumfrence
- 5.4cm “wide”
ey.25.lighthouse.top-floor
let’s see how this one works - done via octoprint
…
two hours in - i wish that i’d copied it to the SD card and pritned from there somehow
… also; i really kind of want a camera.
there’s “like no” state for octoprint, so, i could probably get away with rebuilding the whole thing
…
this also printed fine
ey.24.lighthouse.roof
i’m aprehenive about starting another “large” print witht he filament level(s) i have left
i shall/will start another “tray” for my paint-carasouls
… in theory tho - i should be setting up octo-print
…
i did some napkin estimates and came up with 54 meters of filament left - not enough
i tried out a piece of hagglethorn - no good
i sized up some parts for the lighthous - https://www.thingiverse.com/thing:3706122 so i’m going to test the roof with no supports
i could strtech the building parts vertically to ease this … i think that i will; a minor 10% makes the roof “easier”
ey.23.heliox.bolts-x3
need replacement bolts for the mount arm thing
used my 95% .scad file, then, sclaed it down by 20% - i should update these files at some point
did a new profile
lowest quality with 25% infill in a gyroid patter, 60c bed, 0.75m dist brim, 4 line wall
…
heyaoo
i think that it worked perfectly
let’s try out the/a LED attachments?
… bored … bored; i’ll do something else … maybe
ey.22.ps.haggle.homestead
i want to print the base with reduced filament usage.
question; https://www.facebook.com/groups/Openlock/posts/1184794558663247/
| version | notes |
|---|---|
| v1 | first try - has a big hole where the volume penetrates the seurface. causes islands |
| version | overhang | cube | mass | time |
|---|---|---|---|---|
| stock | yes | 0.5 | 172g | 2d0h7m |
| cubed-v1 | yes | 0.5 | 181g | 1d21h53m |
| culled-v1 | yes | 0.5 | 144g | 1d17h33m |
| culled-v2 | yes | 0.25 | 145g | 1d17h19m |
| culled-v2 | yes | 0.5 | 144g | 1d16h32m |
| culled-v2 | no | 0.5 | 145g | 1d16h45m |
It looks like v1 can save about 30g and 6h30m of time - that’s promising but the shape has a flaw so I can’t use it. I fixed the sape and cut out more areas - v2. v2 is not much better, but, it’s actually printable. I’d like to develop a v3 by moving/shrinking the door-cube; it’s too close to the “concave wall” since that looks like it’s getting very close for comfort.
… and overhang was on THE WHOLE DAMN TIME.
… and it’s more complicated that way … but at least i know it was good to get fixed.
i’m going to print it/this one as “stock” for this run. i’d preffer something faster, but, this lets me (maybe) have the print ready Sunday with no more work now-now.
need to check; - bed temp - already fine - base layer flow - turned down to 90% - overhang - already off
here’s the script thing https://gitlab.com/g-pechorin/hagglethorn-mods
…
it worked out swell!
i should try the chopped version at some point
ey.21.ps.haggle.cottage
| initial | overhang | brim | fill | Gradual infill | step height | size | time |
|---|---|---|---|---|---|---|---|
| 90% | yes | 4.0 | 20% | 0 | 182g | 1d16h1m | |
| 90% | yes | 4.0 | 10% | 0 | 137g | 1d10h45m | |
| 90% | yes | 4.0 | 20% | 2 | 1.5 | 120g | 1d10h36m |
| 90% | yes | 4.0 | 20% | 2 | 5 | 129g | 1d12h1m |
| 90% | yes | 2.0 | 20% | 2 | 5 | 129g | 1d11h59m |
| 90% | no | 4.0 | 20% | 2 | 5 | 130g | 1d12h19m |
| 100% | no | 4.0 | 20% | 2 | 5 | 131g | 1d12h19m |
Okay - but - i’m going to print the roof of the cottage (asish) first. I’d like to do some work to cut the middle out of the cottage with OpenSCAD and give out the .scad file.
i’m tweaking the infill numbers … i’m looking at the “gradual infill” to use less infill in the bottom
used the 4mm brim and only on the outside (so the sockets will be safe?)
… oops …
ey.21-1.ps.haggle.cottage-roof
i had the overhang enabled - so i updated the previous table. … and there was poor adhesion, and, i thought that there was some problem, but, i imagined that when i cancelled.
i also noticed that my “inital layer flow” isn’t “speed” but volume? i’ve turned that back. i’ve switched the bed back up to 60c as well.
…
goodness that’s skipping a lot … and i’m on the first layer? i think that the 90% was a good idea after all AND i should have levelled with paper. here’s hoping my baby get get throught he first layer (or two) fine.
ey.20.ps.rampage-tile-stone
I’ve upped the brim distance to 0.6, but, noticed that the Overhang option was enabled. I’m going to print a single clip to see what’s what with the nozzle. I’m also going to prep a single tile and I’ll do that after if the clip works.
I’m going to lower the bed to 55 (out of fear) and use spray instead of stick.
| overhang | size | time |
|---|---|---|
| yes | 15g | 3h33m |
| no | 13g | 3h24m |
the final print was megastuck tot he bed
ey.19.bsg-little-cottage.115.roof-v2
i gave the plate a quick wipe, and, it felt taky so i skipped glue/clean and just levelled the bed
results (attempt 1)
it adhered, but, around layer2 i realised “make overhang printable” was enabled which filled the underhang wasting material and time
results (attempt 2)
| part | overhang | scale | layer | time | MASS |
|---|---|---|---|---|---|
| v2 roof | yes | 115% | 0.12 | 1 day 18 hours 35 minutes | 182g |
| v2 roof | overhang | 115% | 0.12 | 1 day 23 hours 15 minutes | 135g |
looks like the overhand shouldn’t have been on … but … WtELF is with that time!?
… oh - and - the extruder was clogged. i came back in and noticed the print had gotten stuck.
results (attempt 3)
same .stl as 2 - but - i cleaned out the hot-end and switched to a new nozzle (on 2021-08-19)
RESULT; failure.
I used a combinator of hairspray and pritt as an experiemnt in adhesion … and i think that’s what didn’t work. I walked in to the sight of the stuff on the floor
… also; the hot end is leaking. based on where the dross is pooling (on the top) i suspect that the leak is between the throat and the block. reddit seems to suggest i should tighten the parts when the nozzle is empty and once
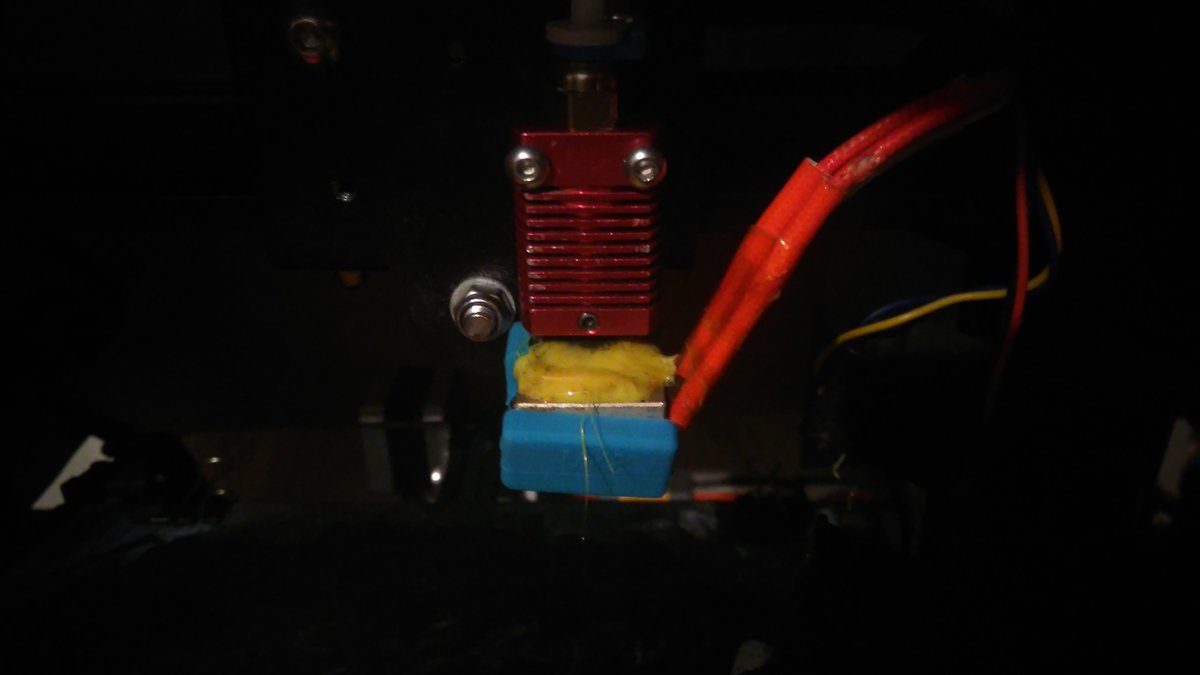
i’m now deliberating on wether i want/need a torch for cleaning
… also the upgrade video for couplers
results (attempt 4)
i replaced the bowden tube using … old replacement tube
i replaced the couplers using … spare couplers i already had
the razors i bought are for shaving and are smaller and floppier than i’d like
i leveled and re-glued the bed (noticing that the glue stick application seemed to “bump” the bed) and set her going
… to be continued …
It looks like one of the corners is peeling. I don’t know if this is from too-little-glue or the curtains being drawn in the room. I’ll keep both factors in mind when I do the next print.
… more updates …
It’s still … working. It should be done some time on Monday.
I’m going to setup a “sequential” print of shrunken Hagglethorn stuff.
… then …
it worked! Gif was skipping a bit durring the end - I worry that I’ll get the cover off and see a nozzle clog. I noticed that the brim was much too close - I’ll increase it from 0.4 to 0.6 and see how that goes. There was/is no exterior leakage on Gif - so that’s good so far.
ey.18.bsg-little-cottage.115.base-no-inside
this will be “Black Scroll Games” model Little Cottage (TabletopRPG house)
… well … it’ll be the “roof” part anyway …
there are variations for this mode, but, i only want the simplest one
i’m assesing which guts i want
i will scale them to 115% (as suggested) for 32mm games
my printer is set to 0.12 which is a finer LOD than the author suggests
| part | scale | layer | time | MASS |
|---|---|---|---|---|
| scalabvle mergedd | 100% | 0.12 | 1 day 6 hours 17 minutes | 115g |
| no inside | 100% | 0.12 | 22 hours 12 minutes | 87g |
| merged v2 | 100% | 0.12 | 2 days 9 hours 12 minutes | 257g |
| v2 roof | 100% | 0.12 | 1 day 6 hours 52 minutes | 126g |
| v2 roof | 100% | 0.2 | 22 hours 14 minutes | 136g |
| v2 roof | 115% | 0.12 | 1 day 18 hours 35 minutes | 182g |
| no inside | 115% | 0.12 | 1 day 4 hours 7 minutes | 114g |
i’ll use the no-inside at 0.12 and 115%
i am worried about running out of filament, so, that’s the “straw” in not doing the one with interiror
ey.18.bsg-little-cottage.115.base-no-inside
i’ve set it going around 10pm on Monday night
results
it was done on Tuesday night (late)
it is mostly-perfect; the support teeth at the top are a bit naff, but, that’s hardly an issue
ey.17.tabletop-plant
https://www.thingiverse.com/thing:4070264
- as 16 otherwise
- level with a piece of paper
- bed at 60
- nozzle at 200
- i’m using a brin with a 1mm distance and 4mm width
results
yeah - this one came out great
brilliant
i’m keeping these settings
still want the fancy tool (someday)
ey.16.5-25-1-move-tray
copying advice (deleted) from reddit.
gonna do hotter nozzle, and, .38 first layer
- nozzle 210
- bed 65
- skirt 1mm
- layer1 thick .38
- layer1 flow 90%
- level with recipt
worked ebter, but, there’s a weird separation between layer1 and layer2
print is usable - but - i want to change the design
ey.15 feedback
- https://www.reddit.com/r/ender3/comments/p4iq6t/adhesion_nightmare_continues/
- https://www.facebook.com/groups/Ender3dp/posts/756878821787122/
Advice Was;
- : a deleted comment advocating thicker “layer1” was AMAZING but successive layers didn’t come out as well
- ; level with printer paper not recipt
- contradicts earlier advice, but, the problem is still here (am applying it)
- ! don’t print super-hot
- contradicts earlier advice, but, the problem is still here (i might ignore)
- ? maybe another filament?
- tempting to switch from the [ey]() once it’s spent; eSun does a 3kg pack that’s cheaper per unit
- ! don’t use a gluestick that’s why your prints (without gluestick) aren’t sticking
- again; this is contradictory
- ; use an car tool thing to level the bed
- ahh; a precise replacement for the paper - yes
ey.15.5-25-1-move-tray
should be a movement tray, but, am using a high accuracy thing and pritt stick for my sanity
looking at previous settings; - build plate was way up - print speed was 45 not 50 - print temp was normal - tree supports and brim/skirt were things
| quality | time | cost |
|---|---|---|
| super (stock) | 3 hours 2 minutes | 13g |
| dynamic (stock) | 2 hours 16 minutes | 14g |
| standard (stock) | 1 hour 47 minutes | 13g |
i went for Super with just 65 plate - i’ll use pritt
…
and it failed
horribly
looks like the print peeled away and the nozzle “cocooned”
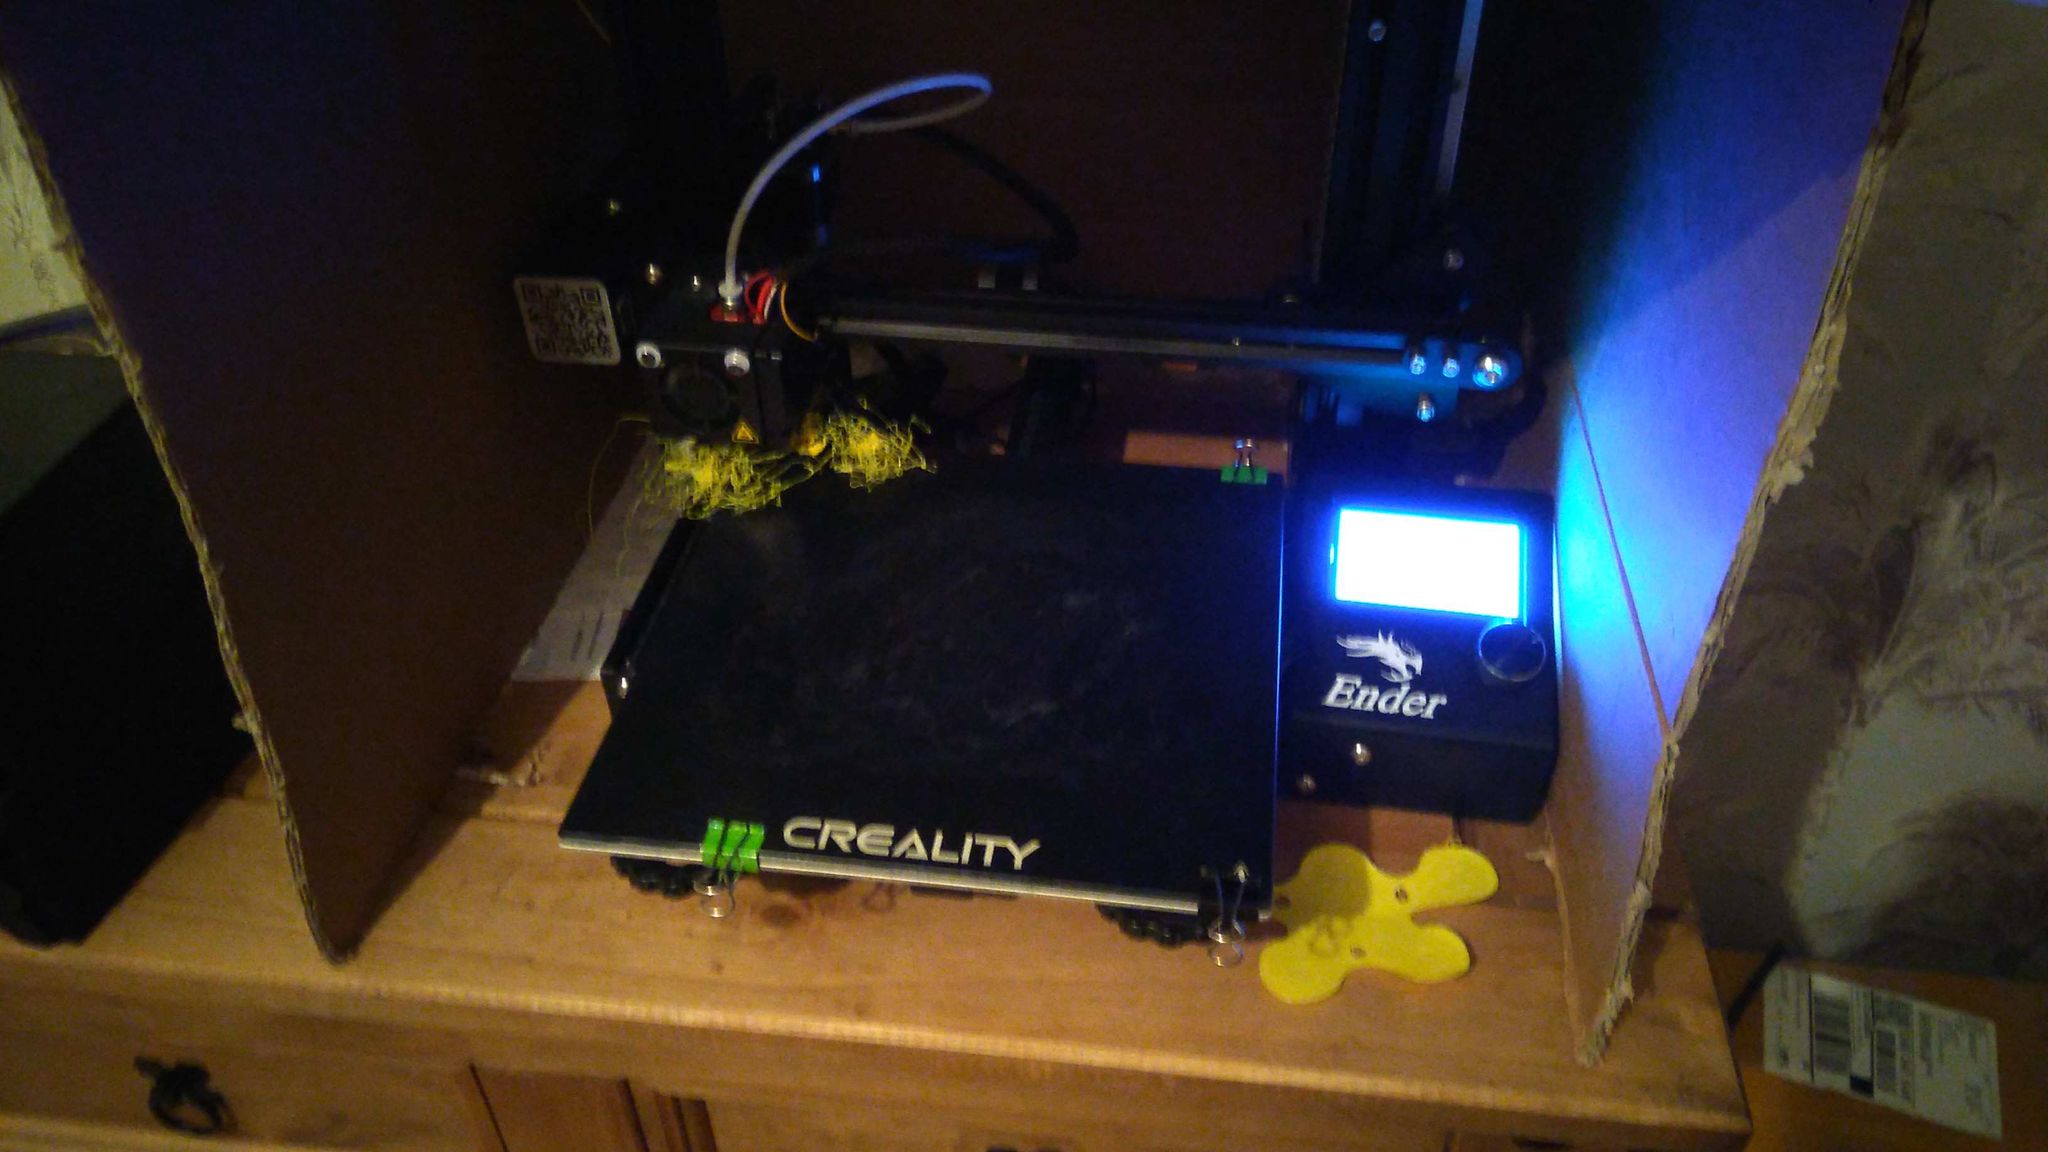
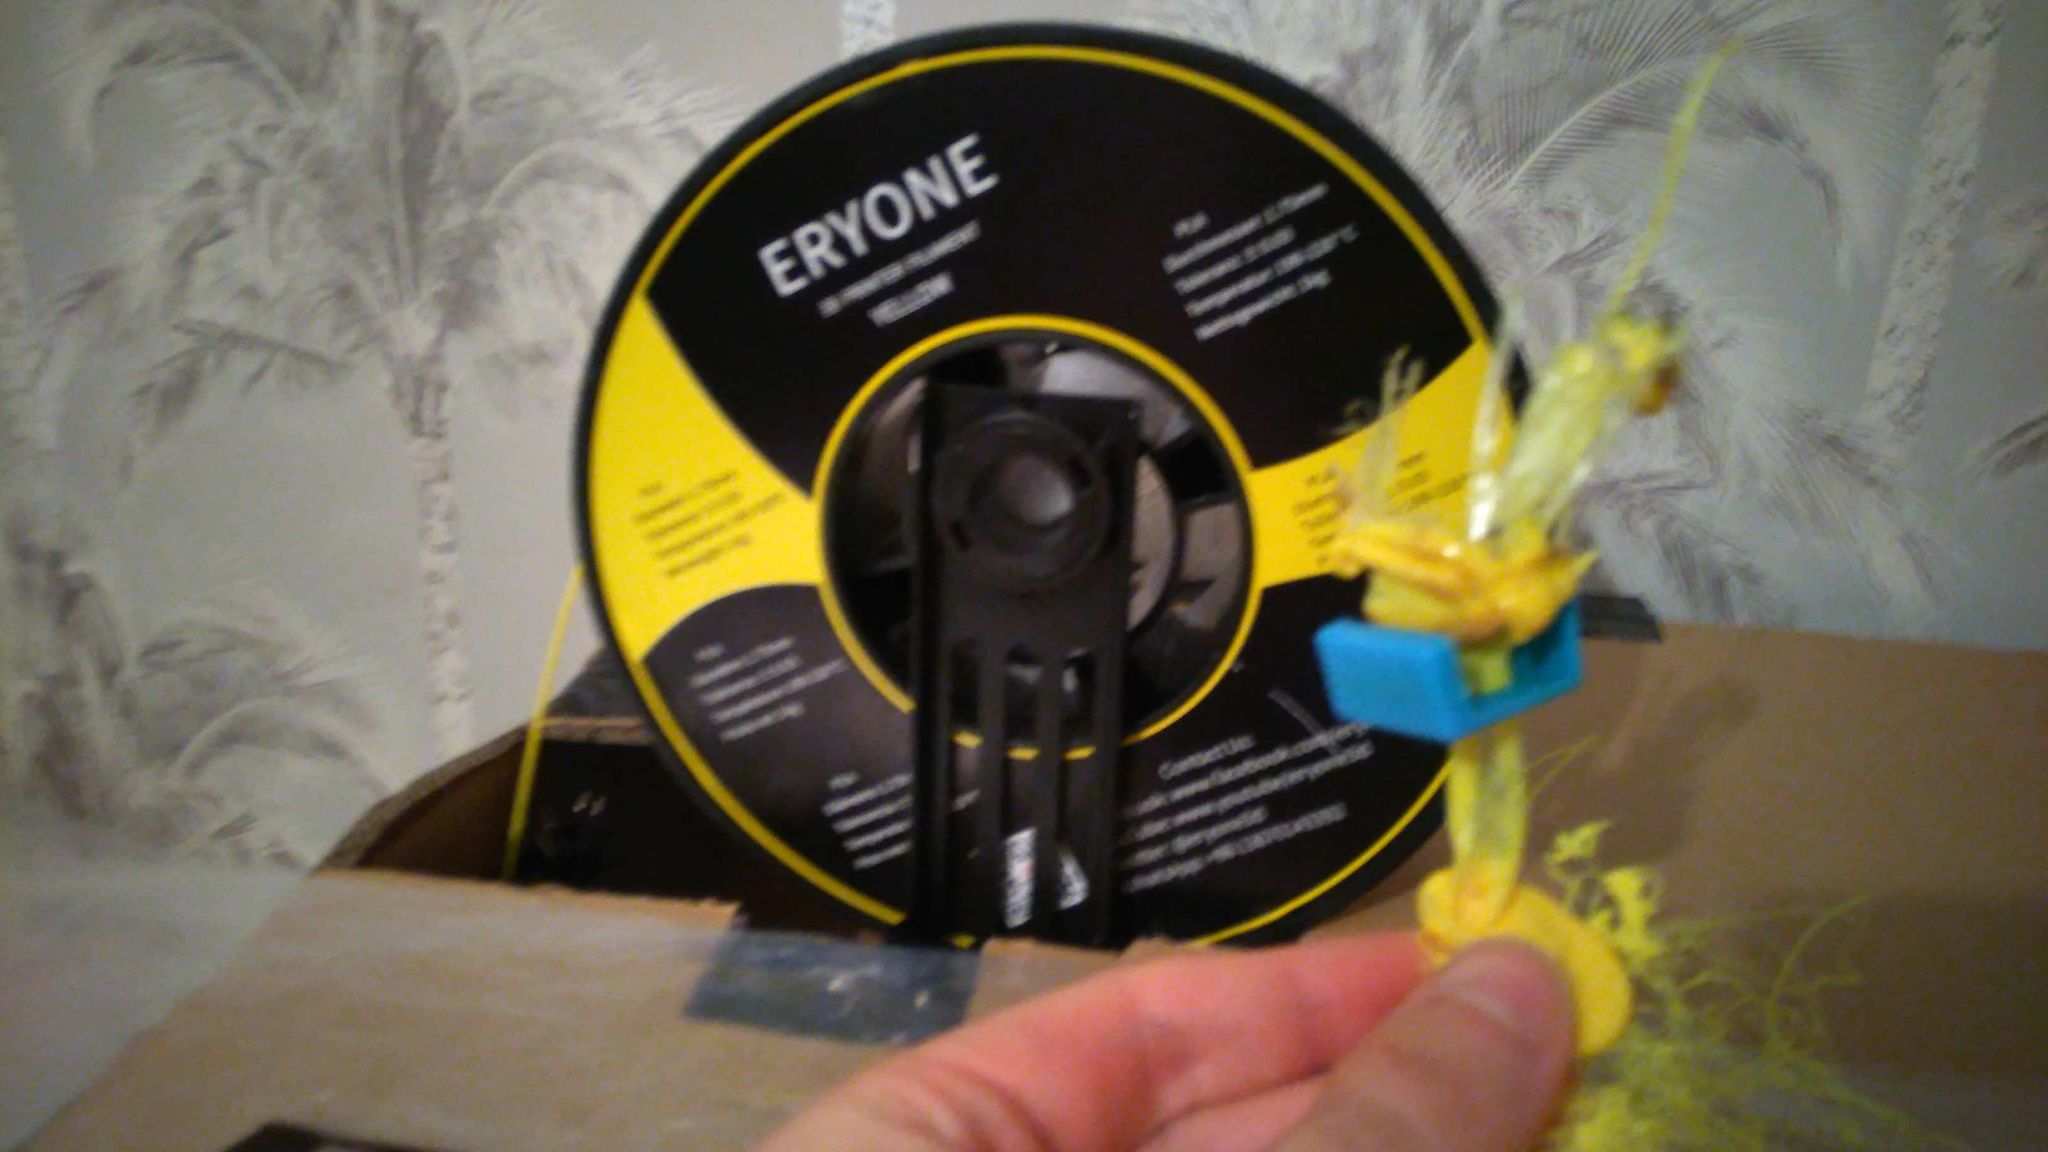
experiment
I’m posting the below on FaceBook and reddit to see which one gives useful advice.
I've been trying to get back into this since ... June?
I haven't had a serious print that's adhered to the build plate ... which is unusual ...

I'm;

* levelling with a receipt
* washing with methylated spirits
* printing on glass
* putting the bed temperature at 65
* (now) using a pritt - brand glue stick\* as the hairspray wasn't working

The print peeled away from the bed during the first layer.
The nozzle isn't clogged
Anyone got any advice?

(\* yes, yes; I'm aware that using adhesives is "uncool" and I should use a glass bed instead. But. I'm doing that ... the glue stick can't hurt adhesion, right?)
ey.14
suffered from bad ahdesion and broke
[Dougnut’s Elegoo Saturn]
DN-01
Just Cirel = 2.90
supported to hell = 8.02
supported to hell2 = 10.??
auto supports 4.60
i should add all the modesl to this file, auto-support it, then send it
- cirel
- wren
- hermes was done as a separate mini
- boat
- abe
- hlarshi
it weorkd. i think that 3d-resin minis are on-par with pewter.
